How to Install Windows 10 on Virtualbox?
If this is the same question that is popping into your mind, then you are definitely gonna love this post.
Nowadays, Windows 10 is one of the most popular operating systems available in the market.
But I think we are very late to cover this topic in 2022.
However, I have already covered the Windows 11 Virtualbox guide in our recent posts. ( which is an upgraded version )
And the best part is that our series of Virtualbox is getting bigger.
Till now, I have installed almost every operating system including macOS, Ubuntu, Android, and ChromeOS.
And now we are here again, installing Windows 10 OS on a Virtual machine using our favorite Virtualbox.
So, let’s see how it works…
Table of Contents
How to Install Windows 10 On VirtualBox Virtual Machine [ 2022 ]
But before we dive in further, let’s see what you need.
Please make sure that you have all the below-mentioned things with you. And if you don’t have it, then you can also download it from the official websites.
Moreover, we have already talked much about these prerequisites in our previous posts like how to install macOS Mojave on VirtualBox in Windows 10 PC, which is a must-read for geeks like you.
And here are things, that we were talking.
- Oracle Virtualbox: Download Link
- Extension Pack: Download Link
- Win 10 ISO VirtualBox: Download Link
Now I hope you have downloaded all the above-mentioned files.
Note:- Please verify that the Hyper-V, VT-x, or AMD-V virtualization features are enabled on your BIOS settings.
So, let’s get started…
1. Download & Install Virtualbox
First, download and install the VirtualBox application on your laptop, computer, or PC.
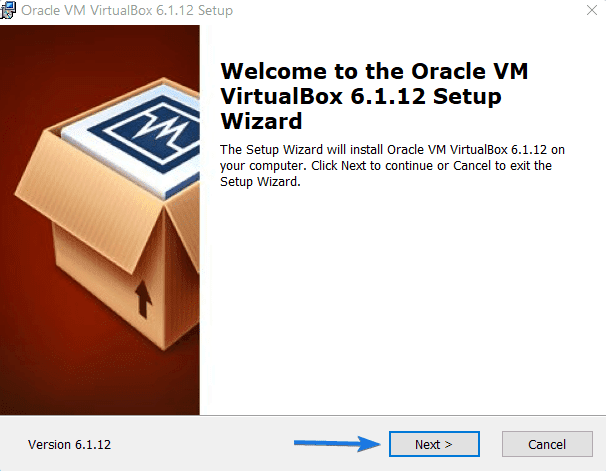
2. Install Extension Pack
Now install the Virtualbox extension pack on your Windows or the machine that you are using. And if you don’t know how to do it, then follow the given source link.
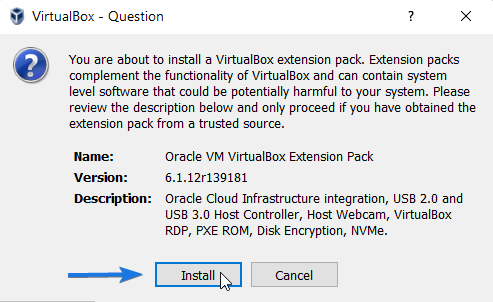
Note:- Installing this will help you in connecting your USB drives and other devices properly to the virtual machines.
3. Open Virtualbox Application
Once both the things are installed on your PC, double-click on the virtualbox.exe file to run the application.
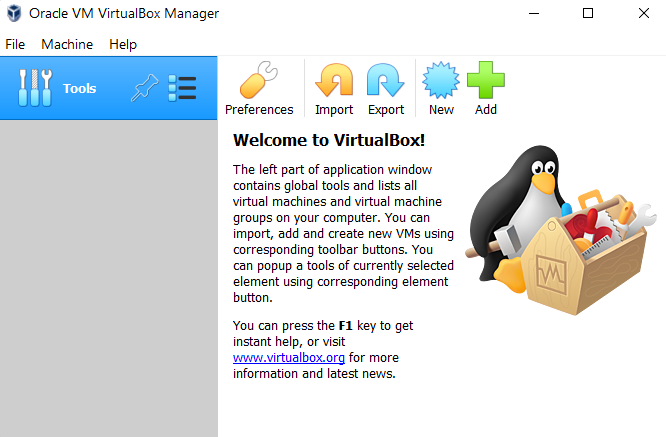
4. Create Windows 10 Virtual Machine
Now to create a virtual machine in Virtualbox, click on the New button.

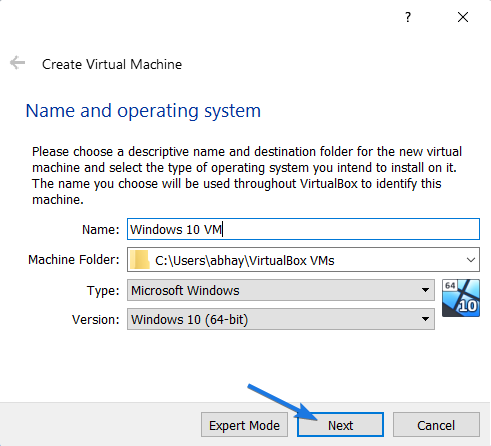
After that, a dialog box will appear which will ask you for the Name of the virtual machine, its type of OS, and its version. So, simply type the name as “Windows 10 VM“, select the type as Microsoft Windows, and then Windows 10 64-bit as the version. Now click on Next.
5. Allocate RAM Memory Size
Now it will ask to allocate the Memory size to the virtual machine, so select the RAM as 2GB or 2048MB ( recommended for Windows 10 ) and then click on the Next button.
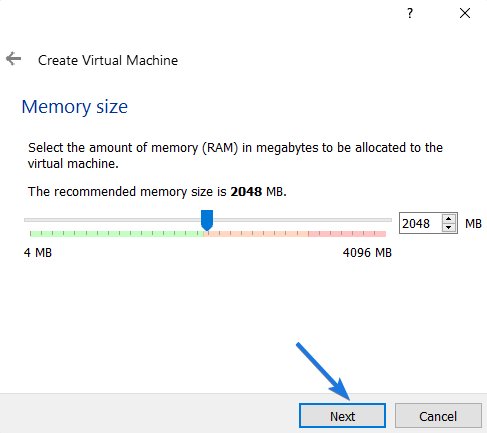
Note:- I would recommend you to please not allocate the full memory of your host system. The best option is to only select the half of the RAM present on your host machine, not more than that.
6. Create Virtual Hard Disk
Next is to create a virtual hard disk or a hard drive for your virtual machine where this Windows 10 OS will be installed and all files will be stored. For that, the recommended size is 50GB, so select accordingly and then click on the Next button.
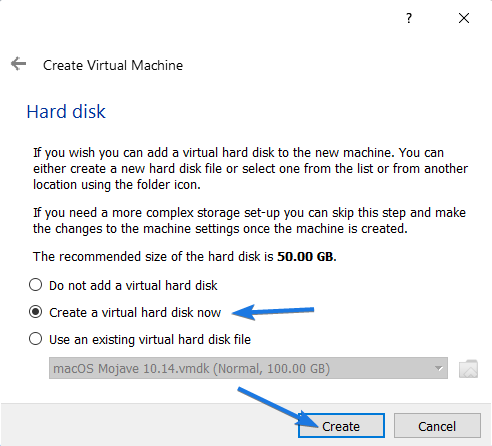
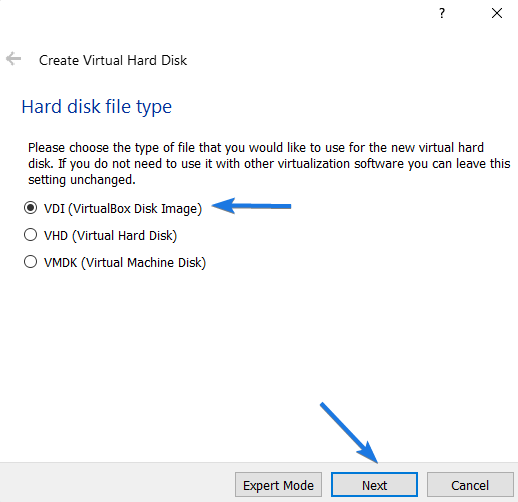
Now select the hard disk file type as VDI (VirtualBox Disk Image) and then click on the Next button.
Next, select the Storage on physical hard disk as Dynamically allocated and then click on the Next button.
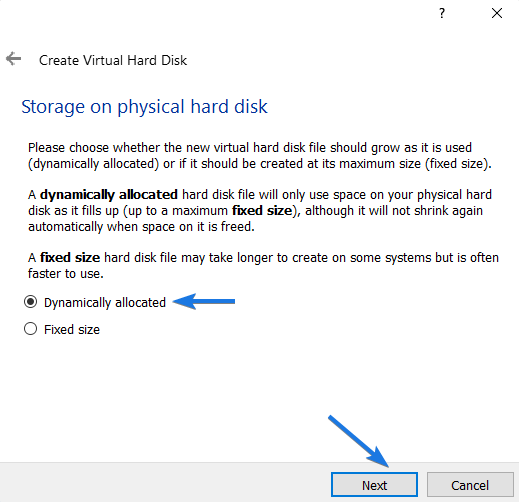
And at last, select the File location and size of the virtual hard drive, so click on Create button.
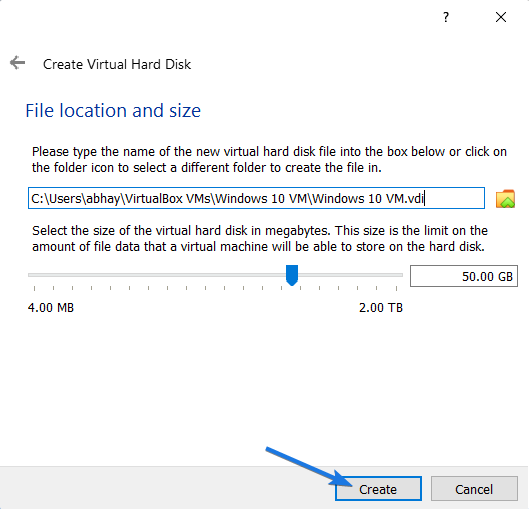
Now let’s move to the configuration part…
7. Configuring Virtual Machine
Now select the Windows 10 virtual machine that we have created and then click on the Settings button icon.
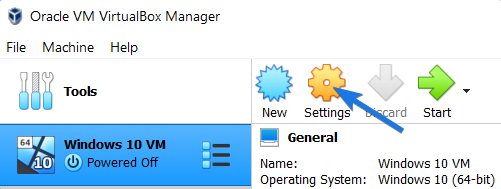
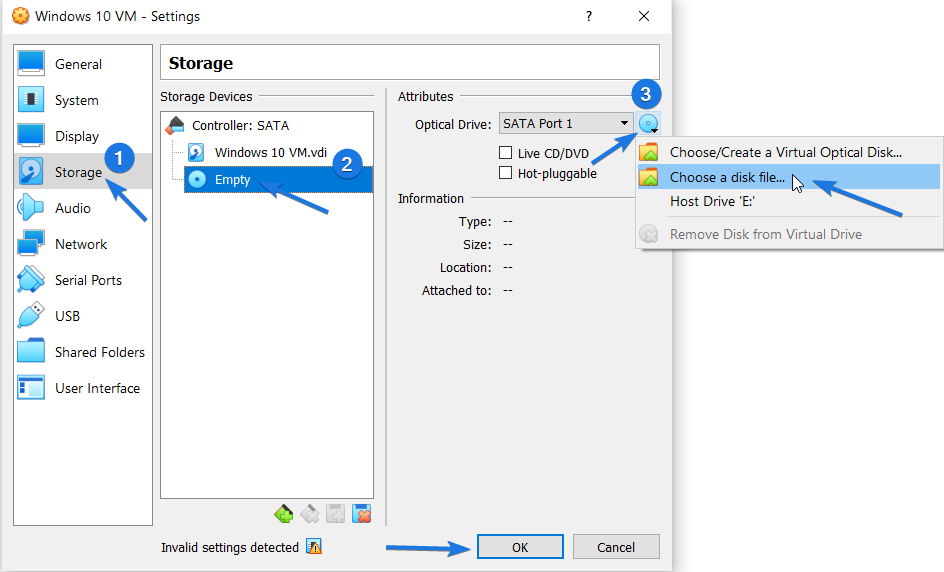
And your Settings dialog box will open up where you can easily configure your settings like Video RAM memory, Processors, and USB Ports. But here in order to install Windows 10 in Virtualbox, we only need to configure the Storage settings part.
So click on the Storage tab, then under the Storage Devices section ( Controller: SATA ) click on the Empty icon. After that, go to the Optical Drive section, click on the CD icon and then select Choose a disk file… option.
Note:- Here we will be booting using the ISO file but if you have a USB drive then you can also boot from USB in Virtualbox using this guide.
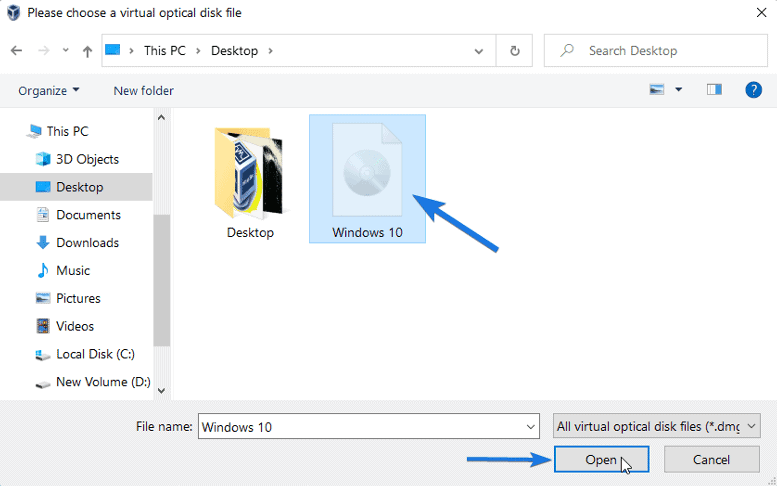
Now navigate to the Windows 10 ISO Image that you have downloaded for Virtualbox and then click on the Open button.
Now your virtual machine is fully configured and ready to run.
8. Run Windows 10 VM Virtualbox
Now open the Oracle VM Virtualbox Manager, then select Windows 10 VM and then click on the Start button.
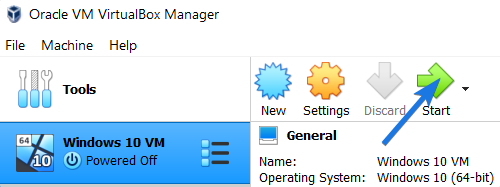
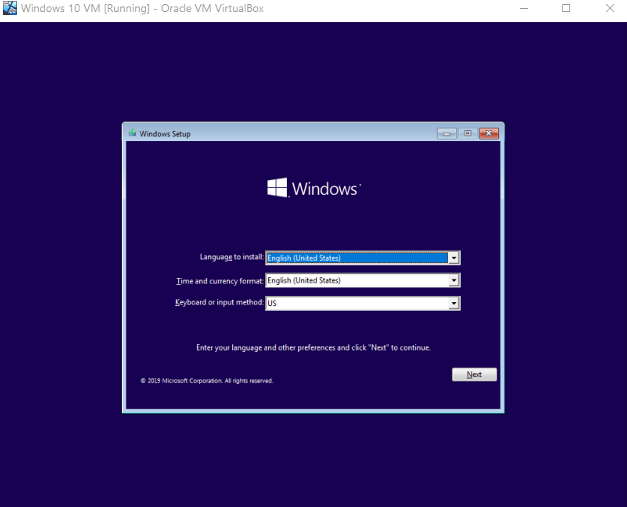
After that, it will start booting and loading Win 10 setup files.

And Done! Now you can see that Windows 10 is running in Virtualbox and if you don’t know how to install it properly then check this guide.
That’s it for now…
Conclusion
So that’s how you can easily install Windows 10 on Oracle VM Virtualbox machine that we created newly. If you are a developer, then you can also use the same method to run technical preview versions on this.
Moreover, you can also follow the same process to install it on other virtualization software like Virtual PC and VMware.
Stay tuned for the latest posts…
Feel free to share your thoughts via comments and also tell us about this post on How to Install Windows 10 On VirtualBox Virtual Machine [ 2022 ].
If you liked this post, don’t forget to share it.

Nice Article, Blog theme is also very user friendly. Tech information is also good on this blog.
Thanks
Hello Digifeast,
Thanks for the feedback. Keep visiting. 🙂
Hi, Abhay.
Thank you for this fine tutorial!
Following along, I just got a request to enter a product key to activate Windows. Thought there was no need for one.
Take care.
Jörg
Thanks so much – easy to follow, SUPER helpful
Thank you for the Windows installation guide. The screenshot made it easier to follow. Thanks for the support.
Hello Joe,
Thanks for sharing your feedback. I am glad that this post helped you. 🙂
Keep Visiting…