Are you looking to convert a bootable USB to ISO?
If yes, then this post is definitely for you.
In our earlier days, we used to store our operating system images on CDs or DVDs. But nowadays, they are totally vanished and even the new laptops or computers don’t have drives for them.
And now if you want to backup them then need a USB flash drive that already has the OS files present on it.
YES, we are talking about the USB drives that we generally create using ISO Images from these guides.
And here we are actually going to reverse that process. In this article, we are going to show you 3 Methods to make ISO from USB and they are also compatible with all the latest versions of Windows.
So without further ado, let’s get started…
Table of Contents
How to Convert Bootable USB to ISO Image [ Windows 10,11 ]
But before we begin. let’s know more about prerequisites.
However, creating ISO from a bootable USB is pretty easy but you have to follow the exact steps with the correct settings. Two settings in which the majority of users get confused or enter wrongly are the Boot Image file and Sectors To Load.
And to help you out with this, here are the right settings.
- Windows 11 = Sectors To Load: 8 and Boot Image: E:\boot\etfsboot.com
- Windows 10 = Sectors To Load: 8 and Boot Image: E:\boot\etfsboot.com
- Windows 7 = Sectors To Load: 8 and Boot Image: E:\BOOT\ETFSBOOT.COM
Note:- The drive letter may differ in your case. So, select carefully.
Method 1: Using ImgBurn
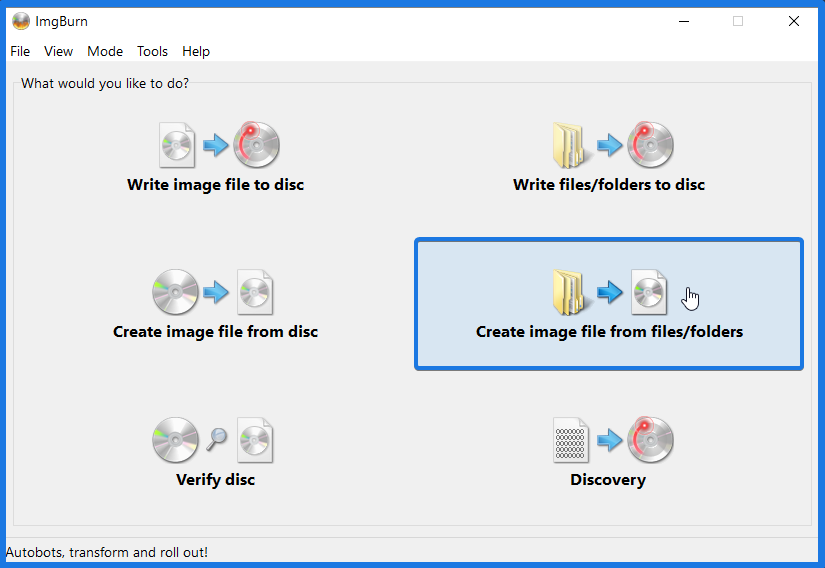
1. Download and install ImgBurn from this link. Once the installation is completed, open this software & insert the USB drive into your PC. After that, click on the Create image file from files/folders option.
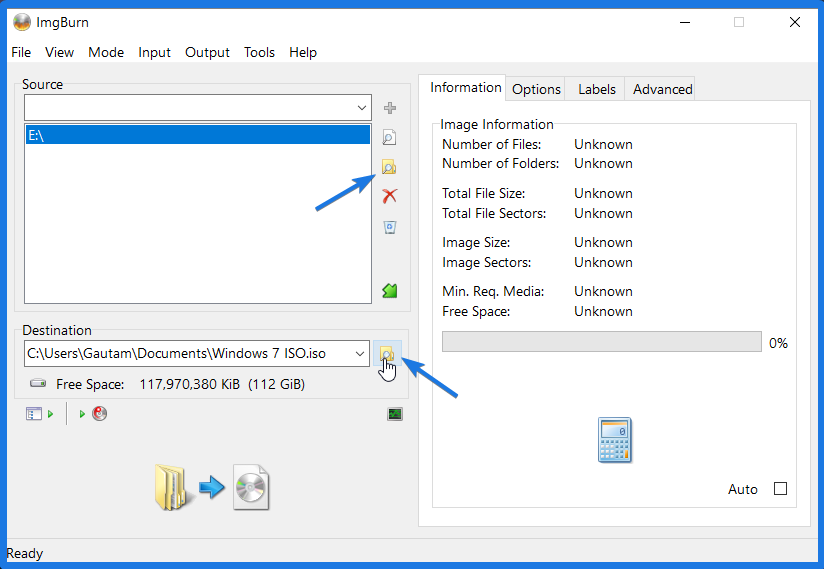
2. Now click on the Browse icon under the source section and then select the Windows bootable USB drive that you have inserted. After that, click on the Destination icon and then select the path where you want to save the newly created ISO file.
3. After that, click on the Advanced tab and then click on the Bootable Disc tab on the right-hand side section. Now under the Options section, enable the Make Image Bootable checkbox.
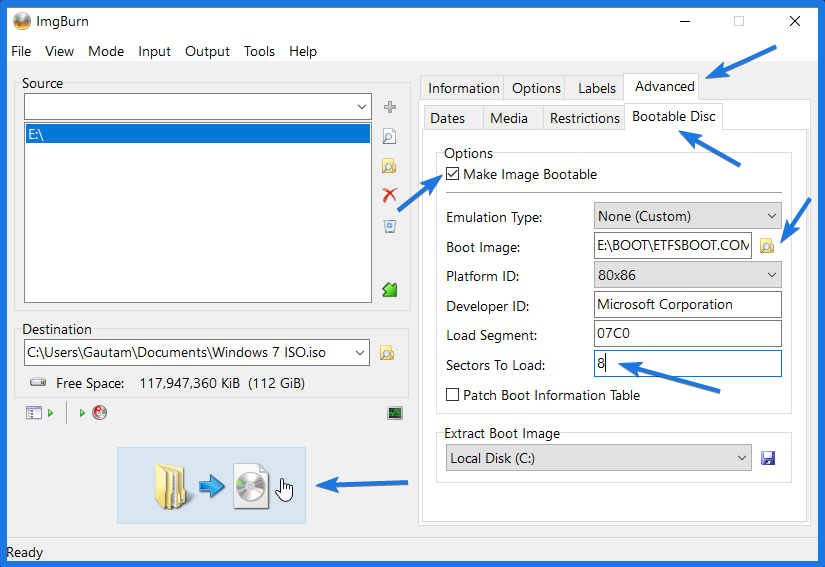
4. Now click on the Browse icon next to the Boot Image field and then select the EFTSBOOT file from the BOOT folder present in the USB stick. After selecting the image file, now enter the Sector To Load value to 8, and then in the Developer ID type “Microsoft Corporation“.

5. On the left-hand side section, click on the Build button, and then a dialog box will appear to “Confirm Volume Label”. Here you can accept the default UDF values and then press Yes to continue.

Note:- If a small pop-up box appears with content type ( files & folder ), then just click the OK button.
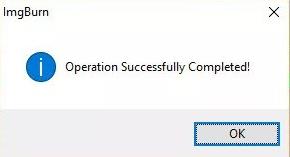
Finally, wait for 5-6 minutes and you will see a success message “Operation Successfully Completed!“, once your ISO image file is ready.
Method 2: Using AnyBurn
1. Download the updated version from the official AnyBurn page.

2. Now locate the setup file, double-click on it, and follow the on-screen instructions to install it.

3. Once the installation is done, open the application and then click on the “Create image file from files/folders” option.
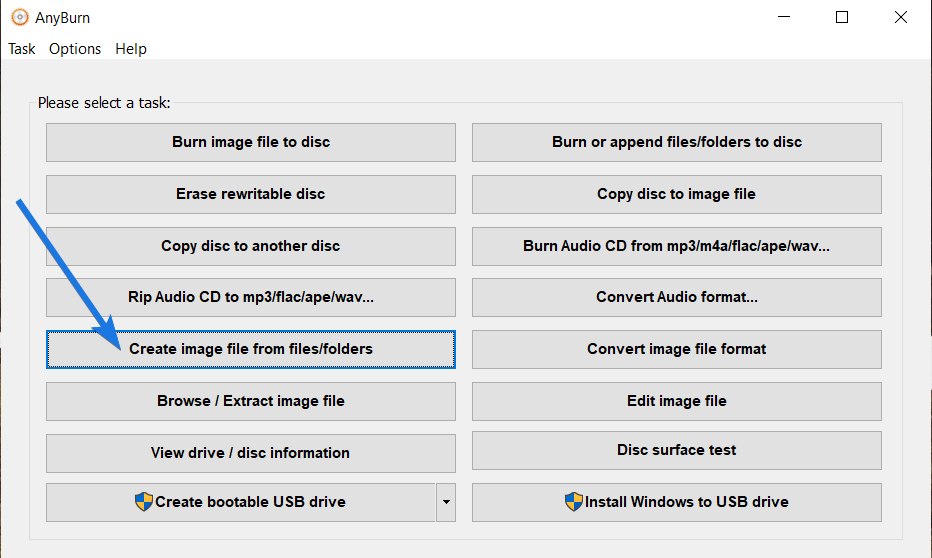
4. After that, click on the “Add ( Green plus icon )” button.

5. Now navigate to the local directory, select all data from the “USB Drive” that you want to convert into an ISO, and then click on the Add button.
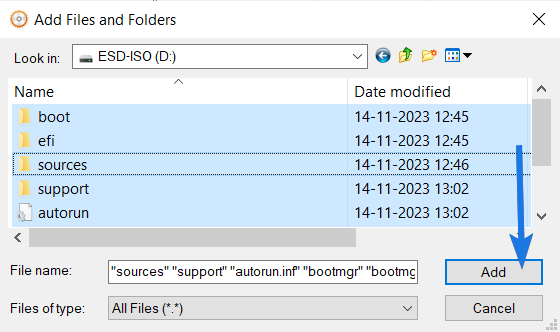
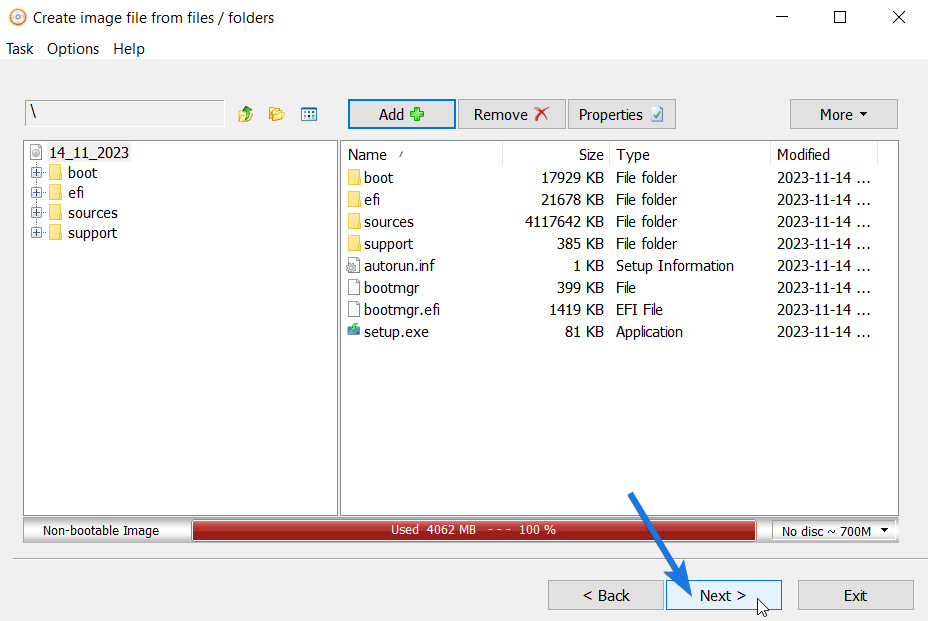
6. After that, the app will automatically load all the bootable files and folders that are required for file creation purposes and click on Next.
7. Now under the “Destination image file” section, select the image file name and location by clicking on the folder icon. After that, select the image file type as the “Standard ISO images (.ISO)” option.

8. Once all settings are finalized, click on the “Create Now” button.
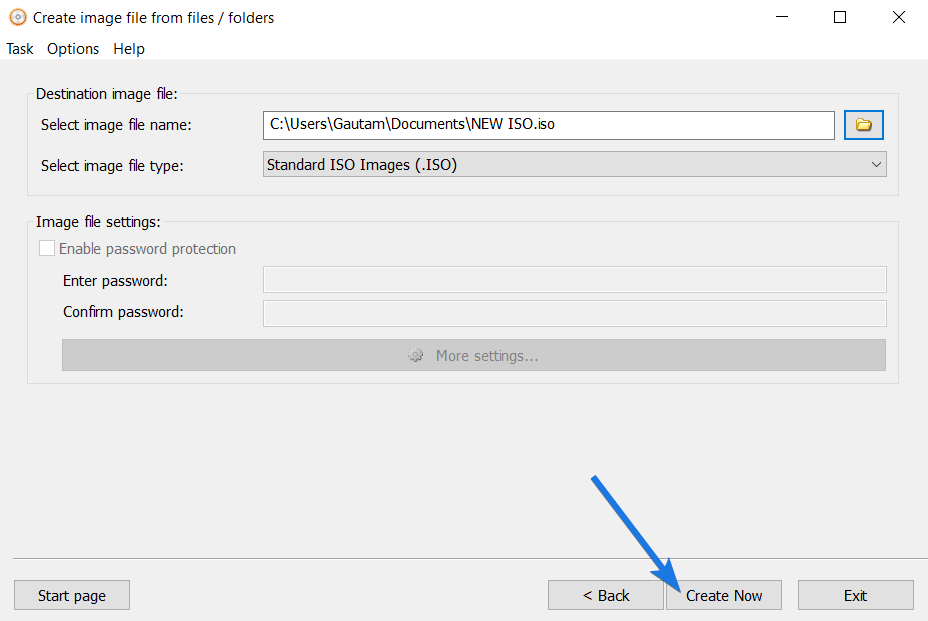
9. Now the application will start creating the image file, so wait for a few minutes to get the process completed.
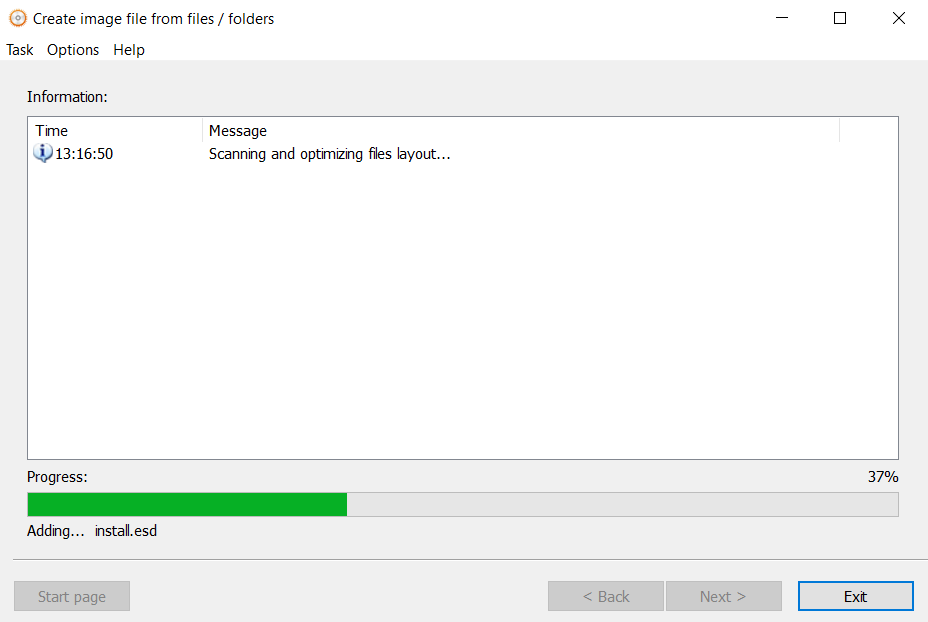
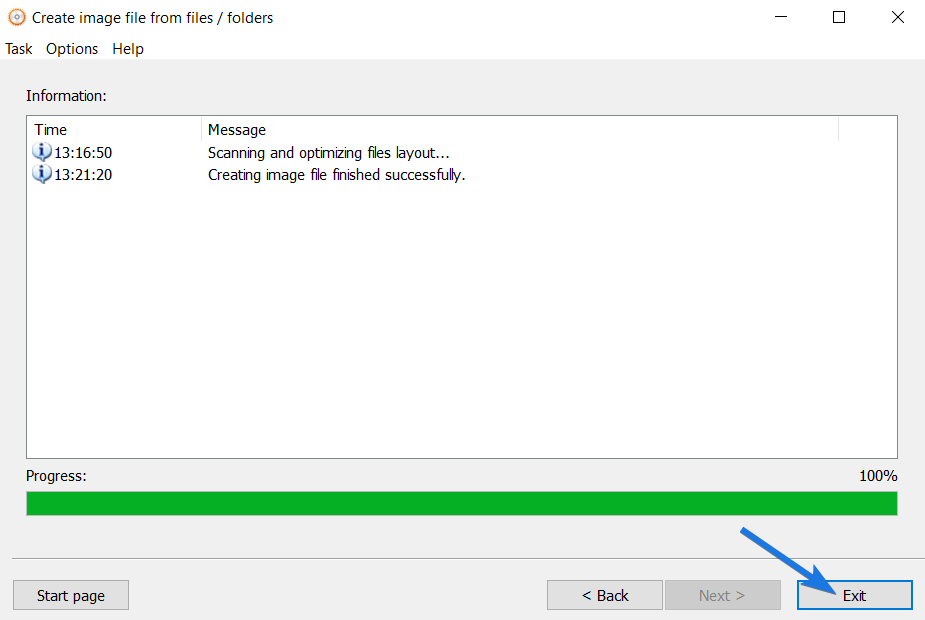
10. Once the ISO file is created successfully, you will see a message in the logs, and then click on the Exit button.
Method 3: Using USB Image Tool
1. Download and install the USB Image Tool from here.
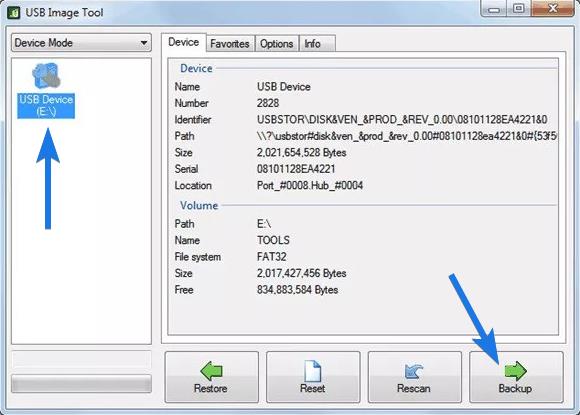
2. Now open the program & insert the USB flash drive in your system.
3. After that select the USB Device (E:\), click on the Backup button, and then select the folder location where you want to save the ISO file.
4. Now since we want to make ISO from a bootable USB, click on the “Save as type” from the drop-down menu and then save it.
Note:- Basically, here we are compressing the files into an image file, so this might take a few minutes to complete the process fully.
That’s it for now…
Some FAQs
Can we create ISO file from bootable USB?
Yes, you can easily create a bootable ISO file from a bootable USB drive for any Windows OS like 11, 10, 7, and more.
How do I make an ISO file from a USB?
Just Download and Install ImgBurn, configure the bootable settings and then follow the steps given in this detailed article.
Can Rufus create ISO from USB?
No, Rufus can’t create ISO from a USB but you can use other tools like USB Image Tool, PowerISO, and more.
How do I make a Windows 10 ISO bootable?
If you have a Windows 10 bootable USB then you can easily make a bootable ISO from it by following the given steps in this article.
Conclusion
So, that’s how you can easily create a bootable ISO from a USB drive and backup it to use later sometime. All the above-mentioned steps work perfectly fine with all Windows variants but if you are looking for Linux or macOS, then the above procedure may not work.
Alternatively, you can also use other third-party tools like PowerISO but above mentioned tools are way much better than others.
Stay tuned for the latest posts.
Feel free to share your thoughts via comments and also tell us about this post on How to Convert Bootable USB to ISO Image File?
If you liked this post, don’t forget to share it.
![How to Convert Bootable USB to ISO Image File Windows 10 How to Convert Bootable USB to ISO Image File [Windows 10]](https://www.buildsometech.com/wp-content/uploads/2019/09/How-to-Convert-Bootable-USB-to-ISO-Image-File-Windows-10.jpg)

works like a charm fantastic software
What if there is no ETFS*.com* boot , but an EFI
Click on show all files instead of show bootable image
Thanks, Kiran. 🙂
Basically, Windows 7 supports ETFS.com boot file whereas windows 10 support EFI file. So select according to your Operating system.
Do you have to change the sector to load number when you chose an EFI file instead of the ETFSBOOT.COM file? I am trying to create an ISO from a bootable Windows 11 USB drive and could not get the ISO to boot after it’s created.
Excellent tutorial, btw. Thanks!
Hello Joe,
If you are converting Windows 11 USB to an ISO file, then just go to the Boot folder, and then you will find an etfsboot file which you have to select as Boot Image, after that change the Sectors To Load as 8. Once all these settings are done, just follow Step 4 mentioned above.
Hope it helps 🙂
Using the link above, McAfee declared it contained a virus and immediately erased it
Hi Alexander,
Yes, some antivirus detects it as a virus but it is truly safe and will not harm your machine & files. While downloading it, please turn off your antivirus & after installation you can turn it on. 🙂
Thanks!
Thanks for sharing this information, maybe you could show how the “build” button looks like since is an ICON no text.
Sure! Will update this soon. 🙂
In the Boot folder on my USB drive there is no etfs.com but in \EFI\Boot there is bootx64.efi. Would I use the latter? Or which efi file?
Hello Roger,
Could you please tell me which Windows operating system files are you using for creating ISO image file?
It created an iso file all right, but Hyper-V refuses to boot from it 🙁
Hello Tim,
In that case, I would suggest you to re-download the ISO image file from the official website and then try. Because we have seen that due to some lost files the ISO image doesn’t boot properly.
And if the issue still persists with the new ISO file, then check whether your boot settings are correctly configured or not.
Hope it helps 🙂
Doesnt seem to work – Windows 11 latest IMG burn
I have no EFI or UEFI folder as they are on a separate partition on USB harddrive (SSD accessed through USB)
seems like i have to do it in linux
Hello Thomas,
I haven’t checked it yet on Windows 11 but soon I will revert you with the answer. But for now, you can surely do that in Linux.
Does this work on other bootable USBs? I am trying to make a backup of my Revo Pro USB stick in case one of the PCs I am working on corrupts it.
No, I don’t think it will exactly work like a bootable ISO of Windows but you can still try it to make an image file.
My Dell Recovery USB drive for Windows 10 Pro gave me a error when it ran;
Directory depth exceeds ISO9660 limit of 8 levels.
Name: ‘\sources\$OEM$\$$\OEM\Apps\DDD\Link\ANW\’
Number of directory levels in path: 9
Most directory levels in any path: 9
Would you like to continue anyway?
Of course I said Yes. When I checked to see what was in that folder and it only has a Alienware Digital Recovery shortcut. Since this isn’t an AW product I’m hopeful.
Hello Paul,
Could you please describe to me more about the issue you are facing? Because we have used this process plenty of times for Windows 10 but I am not sure about that it works with Alienware product or not.
Hello, I tryed with a Rufus-USB and it did not work, so am trying to create a bootable ISO for use under Hyper-V using an original Win11-ISO 22H2 from Microsoft as source, but with the configuration above it does not work too. Any tips?
Hi Jules,
We have used the above steps for Windows 11 also and it worked perfectly fine. I think you have done some wrong settings, please check this comment and let me know if this worked for you or not.