Windows 10 Photo App Showing Deleted Pictures?
If you are searching for this, then you are in the right place.
Although, Microsoft is trying very hard to build applications that can give a personal touch and users can relate to them.
But it really didn’t go well with the official “Photos App“.
Recently, I have seen many users who have reported that the “Windows 10 Photo tile showing deleted photos” and are still appearing in the start menu even after they removed them a few months ago.
However, this is not a bigger concern but some users really want them not to show up in the Live Tile section of their PC. ( It’s a big deal )
And for you, we have got the right solution for this.
So without further ado, let’s get started…
Table of Contents
Windows 10 Photo App Showing Deleted Pictures [ 3 Ways to Fix ]
But before we dive in further, let’s get into more details.
You won’t believe that, I have also seen many users who really like this Live Tile feature because it automatically fetches their favorite photos from the gallery. But this becomes an issue when it also shows pictures that we have permanently deleted. And to explain it in more detail I will answer a small question here.
Q. Why did all my deleted photos reappear?
Ans. Your photos only appear because of the system cache error. Basically, they are not the actual pictures but a cached version of your photos that Windows uses to show them faster.
Please note that some files are never removed from the PC and because only this we were able to restore deleted photos which we have already shown in our previous post.
Now let’s directly move to fix…
1. Clear Live Tile Cache in Windows 10
As we have already said that this error is occurring only because of the system cache, so to fix this we have to clear our recent photos from where these live tile pictures are stored. Furthermore, I would suggest you to check your Recycle Bin again if all the files are completely deleted or not.
And here are the steps to follow:-
1. First go to Start Menu, search for “Run” and then hit Enter.

2. After that, copy-paste the given command & then click OK.
Command:- %USERPROFILE%\AppData\Local\Packages\
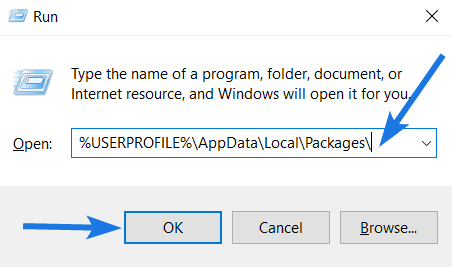
3. Now search for Microsoft.windowsphoto. folder & then Open it.

4. After that, open the LocalState folder. ( This is also known as the photo app cache location in Windows 10 )

Note:- You can also navigate to the given path or location “C:\Users\username\AppData\Local\Packages\Microsoft.Windows.Photos” using Windows Explorer.
5. At last, go to the PhotosAppTile folder and then delete all cached pictures which you don’t want to show up.

And Done! Now restart your PC and after that, you will see all images are removed from the Live Tile or the Start menu.
2. Turn Off Live Tile Option
Although, the above method works really great and is a permanent solution. But if it doesn’t work then you try turning off the Live tile option from the start menu.
And if you don’t know how to do it, here are the steps:-
1. First, go to the Start menu & then right-click on Photos App.
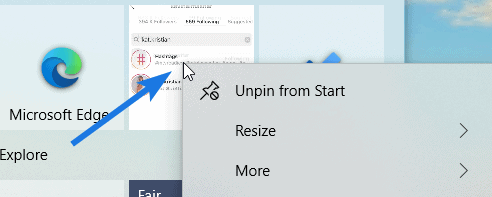
2. Now click on More and then select the Turn Live Tile Off option.

And Done! Now photos app will not display any images and if sometimes you want to undo this, then follow the same steps and Turn Live Tile On.
3. Reinstall Microsoft Photos App
This is one of my favorite methods because if anything does not work reinstalling helped me lots of times. Similarly, you can also try this if the above two methods are not working for you.
And here are the steps to follow:-
1. Go to the Start Menu, search for Windows PowerShell, and then click on Run as administrator.
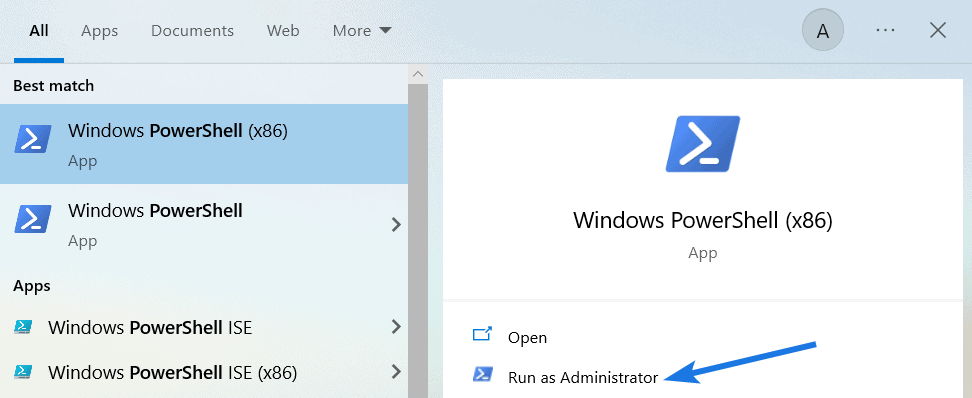
2. After that, type the given command and then hit Enter.
Command:- Get-AppxPackage *photo* | Remove-AppxPackage

Note:- It will take a few minutes, so wait until you see the message that App is successfully uninstalled.
3. Now go to Start Menu and check if it is uninstalled or not.
4. At last, open the Microsoft Store & search for Microsoft Photos and then click on the Get button to install it.

And Done! This method not only allows to delete photos app from windows 10 but also helps in clearing the cached images from the system.
4. Unpin Tile From Start Menu
Now if any of the above methods do not work and Windows photos still showing deleted photos in the Start menu, then you are only left option and you have to unpin the tile from there.
And here are the steps to follow:-
1. Go to the Start menu and then right-click on Photos App.
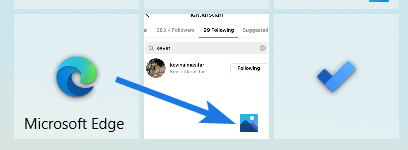
2. Now select the Unpin from Start option.
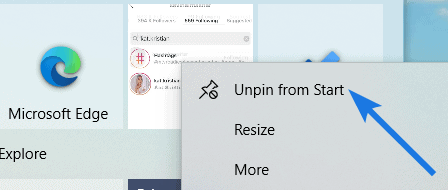
Note:- If sometimes you want to get back the Live Tile, go to the Photos App and then select the Pin to Start option.
That’s it for now…
Conclusion
So, that’s all and if you think the Microsoft photos live tile not working properly then you can check out this guide which we will be adding soon. And I hope all the above methods have helped you in fixing issues.
Also, I would suggest you to use tools like CCleaner which can easily clear all your cached files without doing it manually.
Stay tuned for the latest posts…
Feel free to share your thoughts via comments and also tell us about this post on Windows 10 Photo App Showing Deleted Pictures [ Fixed ].
If you liked this post, don’t forget to share it…


There is definitely a lot to find out about this subject but I like all the points you mentioned.