As a Windows 10 user, taking screenshots is an essential skill that you should know. You may have found yourself in a situation where you need to capture an image of your screen such as capture a full webpage or screenshot a portion of the screen. Whether it’s for work, school, or personal use, taking screenshots can be a useful tool in many situations.
Screenshots are useful for capturing important information, sharing images with friends and colleagues, and troubleshooting technical issues. In this article, we will introduce you to the different ways of taking screenshots on Windows 10.
Table of Contents
How to Screenshot on Windows 10 PC or Laptop?
Although, all the below-mentioned methods are working but if you want some more advanced features and functions then use Method 1. Apart from that, if you are using Windows 11 operating system on any of your machines such as a laptop, Computer, or PC, then visit this detailed article.
Now let’s get started…
Method 1: Taking Screenshots with Gemoo Snap
When it comes to taking screenshots on Windows 10, there are several built-in options available. However, each method has its limitations. If you require more flexibility and advanced features, you may want to consider using a more powerful tool like Gemoo Snap.
Gemoo Snap is a professional screenshot tool that offers a range of features and is available for free. It is available as both a Chrome plug-in and a desktop version for Windows (including Windows 10 and 8) and Mac users. With Gemoo Snap, you can easily capture screenshots and customize them according to your needs.
Key features of Gemoo Snap:
- Allows you to capture a screenshot and add annotations such as brush strokes, text, shapes, numbers, and mosaics.
- You can copy the annotated screenshot to the clipboard.
- Select a specific area of the screen to capture without disrupting the current window or page.
- Offers two options for saving screenshots: directly to the cloud or locally on your device.
- Recognize text within the screenshot and allows you to extract or modify the text as needed.
Let’s start the wonderful experience of the screen on Windows 10 via Gemoo Recorder.
Step 1: To access Gemoo Snap on your computer, log in by entering your account and password after launching the application.

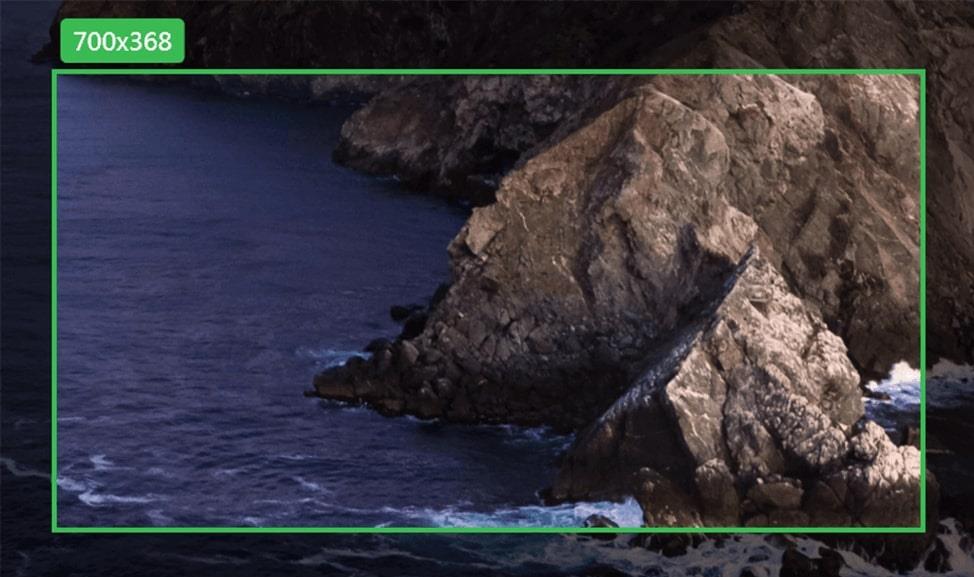
Step 2: Please select a function and click on it. If you want to use the Quick Screenshot feature, simply press the shortcut key PrintScreen. Then, drag your mouse over the region which you want to capture & then release it.
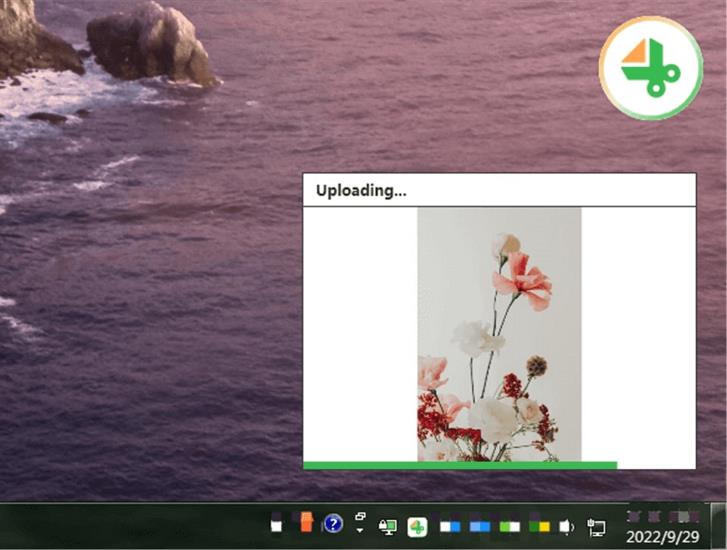
Step 3: Now It will automatically upload the captured screenshot to our very own Gemoo Cloud. However, you can also choose to save it locally.
Method 2: Using the Print Screen Key
The Print Screen key is a quick and easy way to take a screenshot on Windows 10. It can capture the entire screen and stores it in the clipboard.
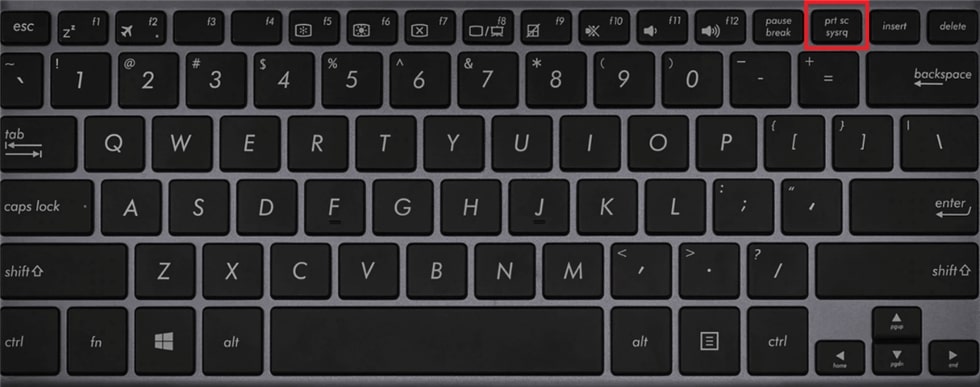
Note:- Print Screen key is usually labeled as “PrtScn” or “Print Scr.”
Here’s how to do it:-
Step 1: Tap on the “Print Screen” key and in the background, this will take a screenshot of your full screen and will save it to the clipboard.
Step 2: Now open the default Paint program on your PC.
Step 3: Press Ctrl + V or right-click and select “Paste” to paste the screenshot into the program.
Step 4: Save the screenshot as an image file.
Method 3: Using the Windows + Print Screen Key
This method is similar to the only Print Screen Key, but it saves the screenshot directly to your computer’s Pictures folder. Let’s see how it works step-by-step:
Step 1: Press the Windows key + Print Screen key at the same time.
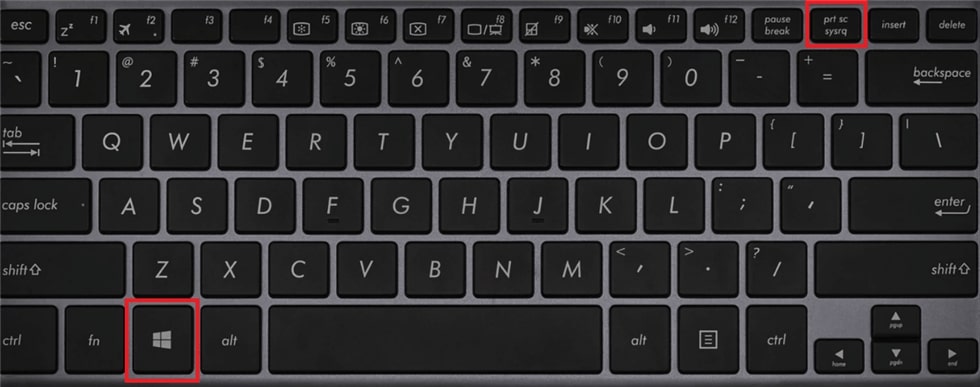
Step 2: Now your screen will get dim for a moment and this indicates that the screenshot has been captured successfully.
Step 3: Now navigate to the Pictures folder on your computer.
Step 4: Look for a folder called “Screenshots.” Your screenshot should be saved in this folder.
Method 4: Using Snipping Tool
The Snip & Sketch tool takes a screenshot of a selected area (only rectangular screenshots are supported) and opens it with the screenshot tool. It offers the option to take screenshots with a three or ten-second delay, which can be useful for capturing menus or interface elements that only appear when interacted with.
Here is a quick guide on how to use Snipping Tool:-
Step 1: First, open the app. You can find it by searching for “Snipping Tool” in the Start menu.
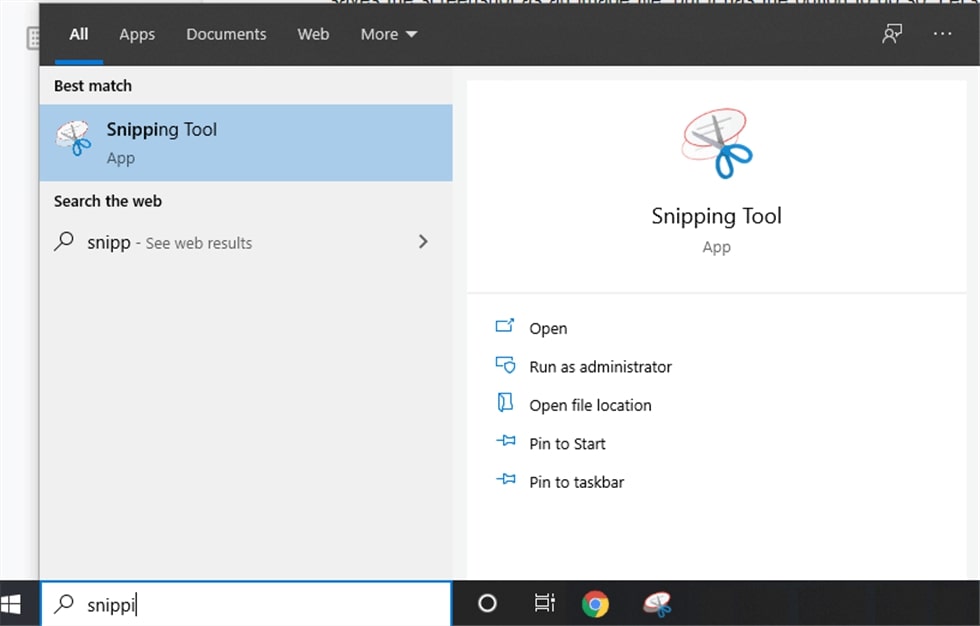
Step 2: Click on “New” to start a new snip.
Step 3: Now select a specific area of the screen that you want to capture.
Step 4: Once you’ve selected the area, the screenshot will appear in the Snipping Tool window.
Step 5: Save the screenshot as an image file.
Method 5: Using Windows + Shift + S Key
This method is similar to the Snipping Tool, but it’s quicker and easier to use. Check its easy steps here:
Step 1: Press the Windows key + Shift + S key at the same time.
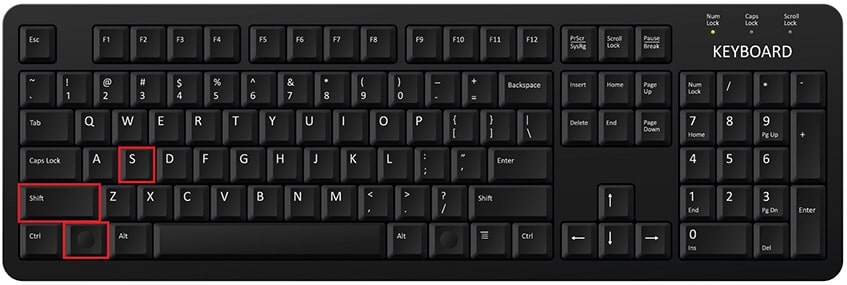
Step 2: Your screen will dim, and a small toolbar will appear at the top of the screen.
Step 3: Now using your mouse select a region of the screen that you want to take as a screenshot image.
Step 4: Now it will be automatically saved to your clipboard.
Step 5: Now open any image editing program such as Paint or Photoshop.
Step 6: Press Ctrl + V or right-click and select “Paste” to paste the screenshot into the program.
Step 7: Now your screenshot will be saved as an image file.
Conclusion
Taking screenshots on Windows 10 is easy and straightforward. Whether you prefer using the Print Screen key, the Snipping Tool, or the Windows + Shift + S key, you can capture important information and share it with others in just a few clicks. Or you can choose a third-party screenshot tool, like Gemoo Recorder, to enjoy a better screenshot experience. With these methods, you’ll be able to take screenshots like a pro in no time.
