Are you struggling to screen record with audio on Windows 11? Maybe you’re making tutorials for an online course or trying to make a game walk-through video. Either way, the ability to record your screen with audio is essential. But don’t worry, this is not that too difficult. All you need to do is download good-quality recording software and set it up properly.
With this thorough guide on recording screens with audio on Windows 11 like a pro—it’ll be smooth sailing through the waters as you become familiar with all its features to create interesting and high-quality content. This blog post will show step-by-step how easy it can be! Following my tips and tricks, you’ll soon become a pro at this task.
Table of Contents
How To Screen Record With Audio On Windows 11 For Free?
For many people, capturing their screen activity has become a vital part of their workflow. Whether you’re creating a tutorial to teach others or want to save a certain moment in gaming, you need the right tools. Luckily, there are two different methods that can help you to record your screen on Windows 11 with the highest quality of audio.
Method 1: Using iTop Screen Recorder [ Free ]
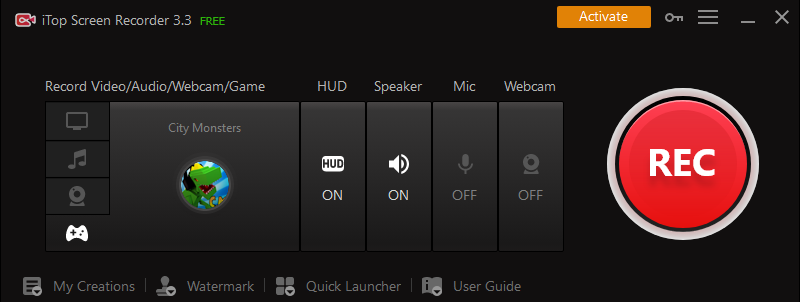
If you are looking for an easier and more efficient way to screen record with sound then iTop Screen Recorder is here to help you. This free screen recording software comes with plenty of features that make it better than the traditional Game Bar, such as its ability to record in high quality.
Here’s how to do it:-
Step 1: Download iTop Screen Recorder for Windows 11 and install it.
Step 2: Click Settings to choose the video size, format, frame rate, and quality of the video. Additionally, you can also select the audio format and frame rate according to your choice.
Step 3: Click the red circle REC button ( or press F9 on your keyboard ) to start capturing your screen with the background audio. Suppose you want to pause the recording, press F10. If you want to end it, press F9 again.
Once you’ve finished, you can preview your recorded video in the output window. If you’re happy with it, click Export to save it. Or, if you need to make some improvements, use the editing features that are available in the iTop Screen Recorder.
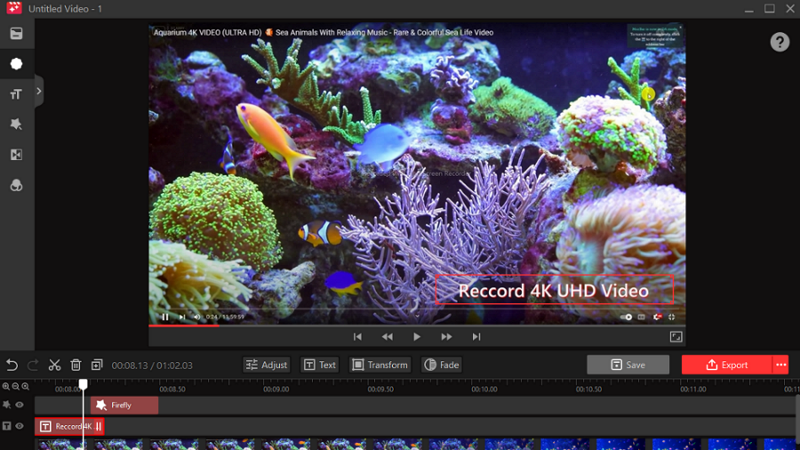
You can crop your video, add annotations, and make other adjustments. When you’re done, save the video to your computer in any format or publish it directly to YouTube. You can even share it with friends and family over social media.
Method 2: Record with built-in Xbox Game Bar
Ready for a more immersive gaming experience? If you are a gamer or streamer then you might have already heard about the Xbox Game Bar. It’s a built-in application that comes with the latest operating system and has the ability to record Windows 11 screens with audio for free. Moreover, you also get plenty of other convenient features at your fingertips.
Here’s how to do it:-
Step 1: Start by pressing the Windows button on your computer.
Step 2: Go to “Settings” and navigate to the “Gaming” tab.
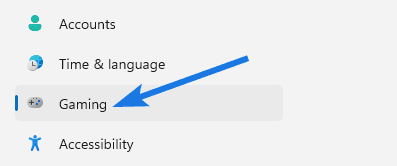
Step 3: Look for the “Xbox Game Bar” tab and toggle on the “Open Xbox Game Bar using this button” option.
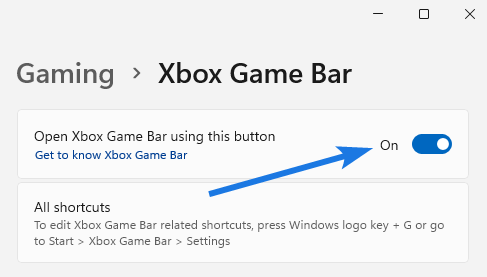
Step 4: Now restart your Computer, PC, or Laptop.
Step 5: After startup is complete, press the “Windows + G” shortcut keys to open up the bar anytime and you will be ready to go.

The Xbox Game Bar has now been activated on your Windows 11 computer. With this handy feature, you can do more than just game – from capturing screenshots to tracking achievements and recording your favorite gaming moments; you can do it all with this application.
Why Do You Need a Professional PC Screen Recorder on Windows 11?
A third-party screen recorder such as iTop makes it easy to capture your screen, no matter what you’re doing. It offers multiple recording modes, a built-in advanced editor, and high-quality audio formats with almost all types of videos like 4k/1080p ( MP4/AVI/WebM and more ).
You can also check out the Best Free Screen Recorder For Windows 10 if you haven’t updated yet any of your machines.
Taking HD Recordings
iTop Screen Recorder is the ultimate tool to capture any visual content on your screen. You can easily record live webinars, online classes, and TV shows in stunning 1080p HD or 4K resolution.
Virtual Background
iTop makes it easy to record your screen with powerful features like webcam recording and virtual backgrounds. Say goodbye to the days of having to lug around a green screen. You can easily customize your virtual backgrounds and choose from the various pre-made or upload your own.
Noise-Reduction
It also features noise reduction that prevents background noise from interfering with your recordings which means from now onwards recording screens with clear voice quality would be much easier. Also, it’s the perfect tool for capturing lectures, webinars, interviews, or any other audio-visual project.
No FPS Drops While Recording
Recording your gameplay has never been easier than with iTop Recorder, a powerful tool that provides you with no frame rate drops while capturing live videos. You can easily record full HD videos of your gameplay, and the intuitive interface makes it easy to set up recordings – no complicated settings are required.
Conclusion
With the knowledge of this guide on how to screen record with audio on your Windows 11, you’ll be able to create professional-level videos for various purposes.
Screen capture is convenient with Xbox Game Bar. To make a well-done screencast, iTop Screen Recorder is the best choice. Its intuitive interface lets you easily capture and record activities on your computer screen. It offers a wide range of features that makes the recording process hassle-free – from capturing cursor movements and sounds to trimming and editing screen videos.
So, get it now and start sharing content with others quickly!
