Does your TranslucentTB app also not working?
If yes, then you are in the right place.
Recently, Microsoft released a new moment 2 update for Windows 11 which was pretty great and loaded with new features.
But sadly it has also broken some applications like TranslucentTB which we have personally used to make our taskbar transparent because the company doesn’t provide any in-built default settings to do that.
Although there is an option to enable the transparency effect in the Personalization settings, it doesn’t make the taskbar as clear as the majority of users want on their Windows 11 PC.
But after this new update, many users have reported that they are facing issues with the TranslucentTB and no transparency is working.
So, without further ado, let’s dive in further…
Table of Contents
TranslucentTB Not Working Windows 11 [ 5+ Taskbar Fixes ]
If we talk about the Taskbar settings then you won’t find any transparency option but with the TranslucentTB you get three different levels ( opaque, slightly translucent, and completely transparent ) that can seamlessly integrate into the background without compromising the battery life of your Windows 11 device.
Being a free application in Microsoft Store, you don’t get any fast premium support. But don’t worry, the developer of this app has commented that they know about this issue and soon it will be fixed.
But till then, you can also use these 6 simple methods to fix this problem and get your taskbar looking just the way you want it now.
So, let’s get started…
Method 1: Using ViVeTool
The first method to fix the TranslucentTB issue on Windows 11 involves using a tool called ViVeTool. Here you have to create some folders, extract those files, run some commands, and then, at last, Reboot the PC.
Follow this step-by-step process:-
1. Use this link to access the download page for ViVeTool. ( Make sure you get the latest version 0.3.2 )

2. Once the download is complete, extract the file from the ZIP archive.
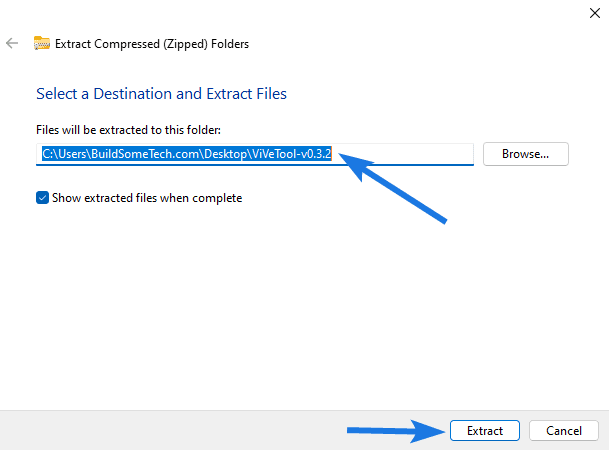
3. Create a new folder, name it “zVIVE” and then move the extracted files into this newly created folder.
4. Now open the “Command Prompt” and then Run as administrator.
5. In the prompt window, type in “cd C:\zVIVE” and hit Enter.
6. Next, paste this command: “vivetool /disable /id:26008830” and hit the Enter button.
Now wait for a few minutes and then restart your computer. By following these necessary commands your issue will be fixed now.
Method 2: Repair/Reset TranslucentTB
In plenty of cases, issues like this can be easily solved by just repairing the app files or resetting them properly. Apart from that, if the issue still persists then you can also uninstall the Translucent TB application and then reinstall it later.
Here are the necessary steps:-
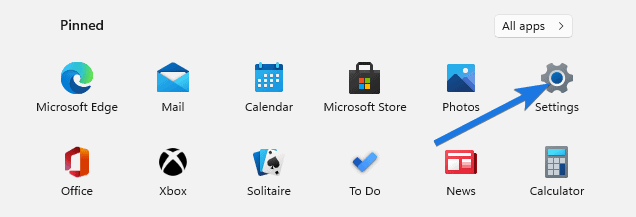
1. Open the Windows 11 settings app.
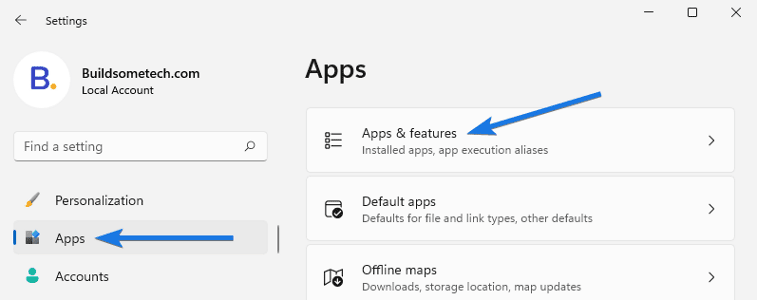
2. Navigate to “Apps” and then “Apps & features“.
3. Scroll down and select “TranslucentTB” from the list of apps.
4. Click on the 3 dots icon and select “Advanced options“.
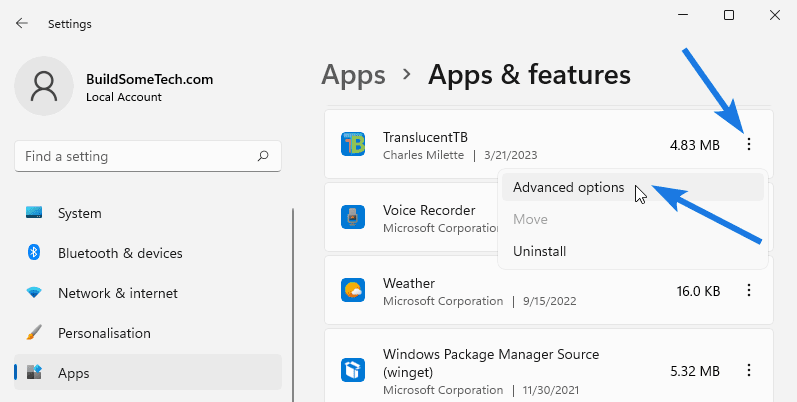
5. Find the “Reset” section & then click on the “Repair” button. You can also click on the “Reset” button if the issue is not fixed.
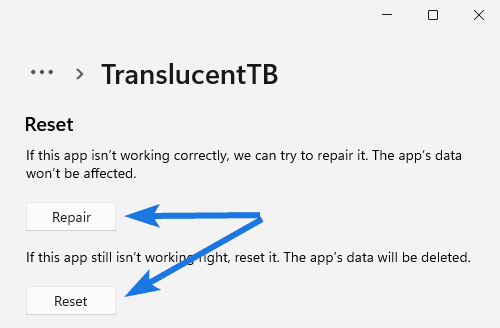
After that, wait for the repair process to complete and check if this method has worked for you or not.
Method 3: Reboot your PC
Sometimes, a simple reboot can fix various issues on your Windows 11 laptop, computer, or PC, as well as when the TranslucentTB is not working correctly or facing some problems.
Follow these steps:-
- Press the Windows key or click on the Start button.
- Now click on the “Power” icon and then select Restart.

Note:- Please make sure you save and close all your important files or programs before performing these steps.
Method 4: Uninstall Windows Update
As we have already mentioned that this app has caused issues after the Moment 2 update or you can say the KB5022913 update. So, now you have two options either you can uninstall the recently installed update or you can wait for the new stable update with these bug fixes.
Note:- Generally, we prefer waiting for the new update release but sometimes it takes more time and in that case, you can uninstall it if needed.
Here’s how to do it:-
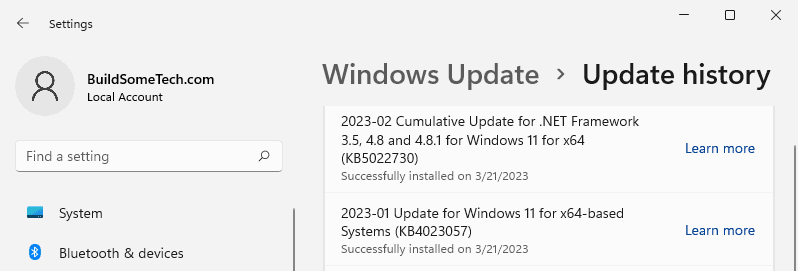
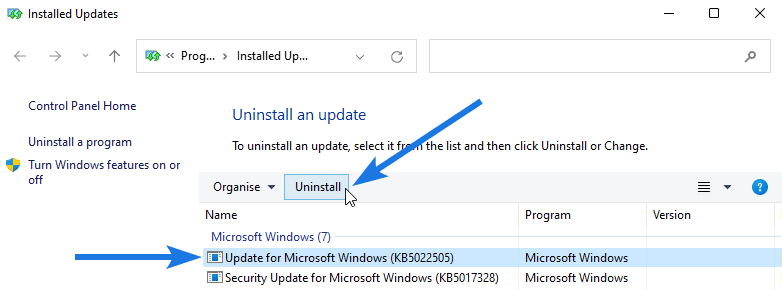
1. Head over to “Windows Settings > Windows Update > Update history“.
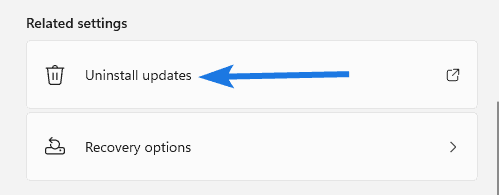
2. Now go to the “Uninstall updates” tab, under the Related settings section.
3. After that, select the recent update, click on Uninstall button, and then follow the on-screen manual to remove it properly.
Method 5: Re-register Taskbar
Apart from the TranslucentTB problems, Re-register is a quick and easy way to resolve issues related to the taskbar, such as it not responding, missing icons, being unresponsive, and if you are unable to move the taskbar to the left side.
1. Go to Notepad and paste this code.
@echo off
taskkill /f /im explorer.exe
taskkill /f /im shellexperiencehost.exe
timeout /t 3 /NOBREAK > nul
del %localappdata%\Packages\Microsoft.Windows.ShellExperienceHost_cw5n1h2txyewy\TempState\* /q
timeout /t 2 /NOBREAK > nul
start explorer
@echo on
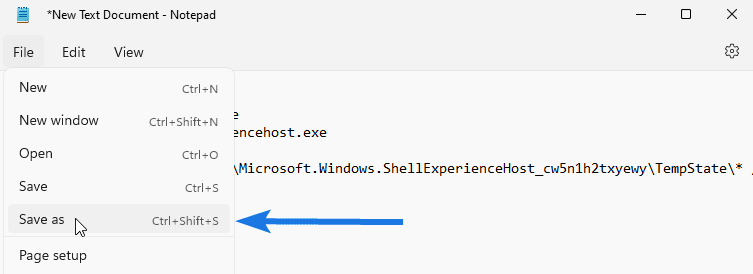
2. Click on the “File” option and then select “Save As” from the dropdown menu.
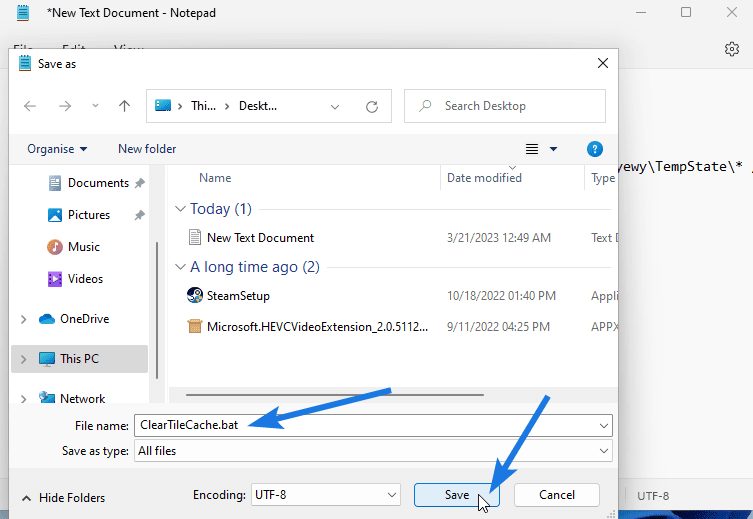
3. Choose a drive location to save the file, name it “ClearTileCache.bat” and then click on the “Save” button to save the file.
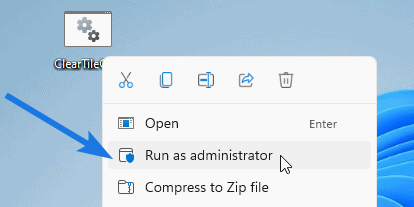
4. After that, right-click on the saved file & then choose “Run as administrator” from the dropdown menu. Now, wait for a few seconds to let the process complete.
Note:- Running the batch file may cause a temporary fluctuation or disappearance of the desktop and other items.
Method 6: Using Registry Editor
To potentially resolve the issue of the Windows 11 taskbar transparency not working, some users have found success by following these steps.
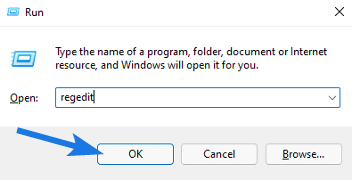
1. Open the Run dialog box, type “regedit” and then click OK.
2. In the Registry Editor, navigate to this key:-
Computer\HKEY_LOCAL_MACHINE\SOFTWARE\Microsoft\Windows\Dwm3. Now on the right-hand side section, right-click and then select New > DWORD (32-bit) value.
4. Name this new value key as “ForceEffectMode” and set the value to “2“.
5. Now close the Registry Editor and restart your system so that the changes can effect properly.
Note:- Editing the registry files can be risky, so proceed with caution and create a backup of your registry before making any changes.
That’s it for now…
Conclusion
So, that’s all about the fixes of the TranslucentTB for getting a transparent taskbar on Windows 11. Each method involves different steps and approaches, but ultimately they all aim to resolve the same issue.
Based on my research and analysis, I found that all of the methods listed have been proven to work, but some are easier than others. In particular, I recommend trying out methods 1, 2, and 5. They’re straightforward and easy to understand.
So, before you go ahead with the complex solutions, give these methods a try. They are guaranteed to solve your problem!
Stay tuned for the latest posts…
Feel free to share your thoughts via comments and also tell us about this post on TranslucentTB Not Working Windows 11 [ 5+ Methods to Fix ].
If you liked this post, don’t forget to share it.
