Want to fix cFosSpeed Driver Windows 11 error?
If yes then you are in the right place.
However, it has been almost a month when Microsoft released its latest Windows 11 ISO.
But many users are still facing issues related to Install & Update errors.
And you won’t believe that most of them are Asus & MSI users and they are saying that it’s related to cFosSpeed Driver and getting an error “This PC can’t be upgraded to Windows 11“.
Apart from this, many users have also reported that they are facing issues while playing high-quality videos on the internet.
And it’s all happing because of the “cFosSpeed Service MSI“.
But don’t worry, we have got the fix for this.
So, let’s get started…
Also Read:- Intel i7-7700K is not Compatible with Windows 11?
Table of Contents
What is cFosSpeed?

cFosSpeed is a network driver that helps in increasing the network speed. Basically, this is not an MSI product but usually comes with MSI motherboards as an additional feature. Mainly this driver is added to optimize the data transfer and internet connection in a very nice way. It uses Traffic Shaping technology which allows it to increase the speed and decrease the ping. And by this, you get a minimal ping if this driver is installed on your computer & eventually gets a better speed.
Now let’s move ahead with the fix.
Fix cFosSpeed Driver Windows 11 Error via Update or Install
Although, this driver works really great in providing amazing internet speed but from now onwards it’s facing some compatibility issues with this latest Windows OS. And most of the users are facing errors while upgrading to Windows 11 and getting a “cFosSpeed Driver – Your PC has a service that isn’t ready for this version of Windows 10. A new version is available.“
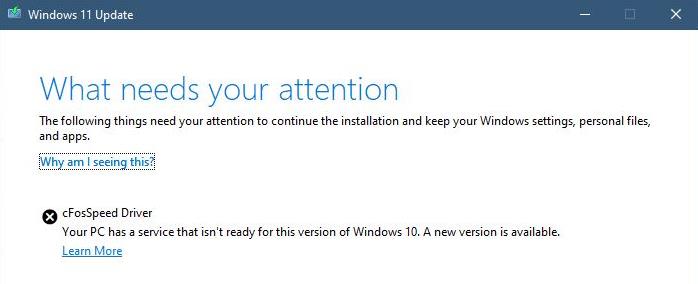
But how to deal with this issue. Here are two options to fix this cFosSpeed Driver error, first is installing or updating this driver again and if this doesn’t work for you then the only option left is to uninstall it. Below I have mentioned some quick step-by-step guides that you can use.
So, without further ado, let’s get started…
Update cFosSpeed Driver via Dragon Center App [ MSI Users ]
This method is basically for MSI users because Dragon Center App is officially designed for the PC or laptop having an MSI motherboard. And I think that updating this application can help you in fixing this compatibility issue which you are facing with Windows 11.
So, let’s follow the steps given below:-
1. First, open the given Dragon Center App link.
2. Now scroll down and click on the Download Now link.

3. Once the file is downloaded, right-click on it & then extract the files.
4. Now double-click on the extracted files and then follow the on-screen instructions to install the Dragon Center.
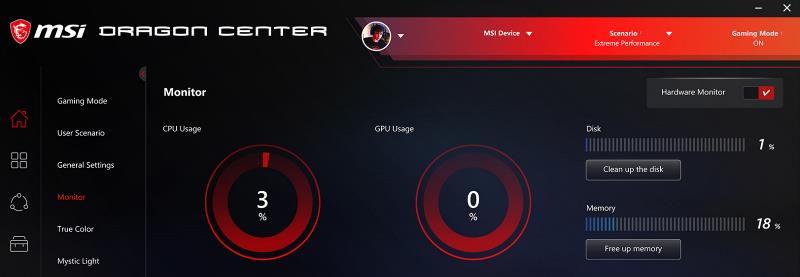
5. Now restart your PC and try to update to Windows 11.
And hopefully, you will not face any further issues & if this doesn’t work for you then follow the next method.
Download & Install cFosSpeed Driver form Official Website
Although the above works really great for MSI users but if your laptop or PC has some other motherboard like Asus, Asrock, Gigabyte, then this method will help you. Here you might be thinking that your PC already has cFosSpeed installed on it but I would suggest you to install the latest version or update it from this step-by-step guide.
So, let’s follow the steps given below:-
1. First, open the given cFos software link.

2. After that, scroll down & click on the cFosSpeed Download link.
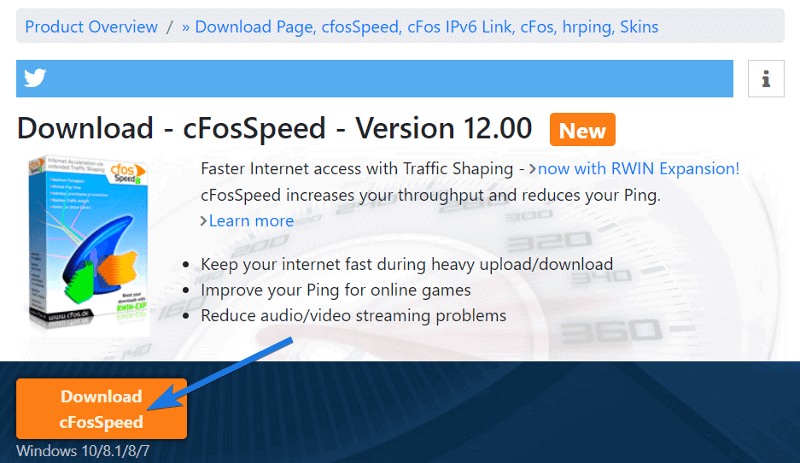
3. Once the file is downloaded, double-click on it and then follow the on-screen instruction to install it.
4. Now reboot your PC and check if it’s running or not.
If you don’t know how to check it, then you can go to the system tray at the bottom right corner. And if you are unable to see the status then follow the next steps, we will try to install the beta version.
And for that follow the given steps:-
1. Now open the same cFos software link. ( given above )
2. After that, scroll down and then click on the Download current beta build link.

3. Now under the Internet Acceleration via Traffic Shaping section, click on the cfosspeed-v1201-build2516.exe download link.

4. Now install the downloaded file and then restart your PC.
If updating and installing these new drivers doesn’t fix this compatibility issue then the only option left is to remove the cFosSpeed driver.
Also Read:- How to Install Windows 11 on Unsupported PC
Now let’s see how to do it.
How to Remove or Uninstall cFosSpeed Driver on Windows 11 / 10
But before removing it, here is one query…
Do I need cfosspeed? Really
Yes, you need it but it’s not compulsory. If you are facing this again & again then I would suggest you to uninstall the cFosSpeed Driver then try to update again for Windows 11. And when the installation is done, you can reinstall it back.
So, let’s follow the steps given below:-
Remove cFosSpeed Driver [ MSI users ]
1. First, open the Dragon Center App.
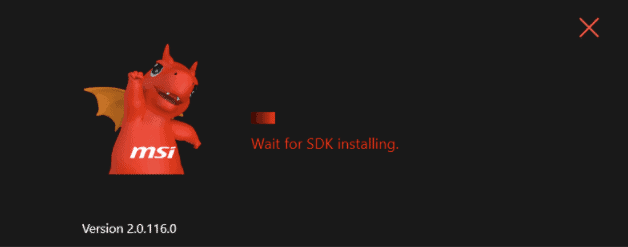
2. Now use the scanning features to get a list of all different features.
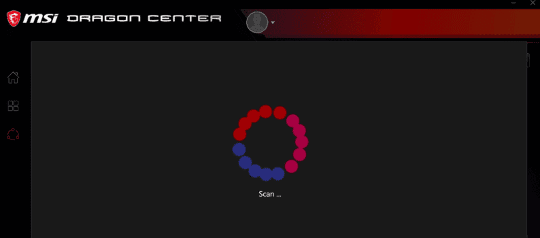
3. After that, search for cFosSpeed and delete it.
4. Now close the Dragon Centre and reboot your PC.
Note:- Since cFosSpeed driver is a pre-installed app for MSI users that’s why sometimes MSI Dragon Centre automatically installs it back.
And if you are also facing this issue then follow the next guide.
Uninstall cFosSpeed Driver [ Asus, Asrock, Gigabyte users ]
The above method was specifically for the MSI users but they can also use this if they are facing a “cFosSpeed keeps reinstalling” issue. Basically, this method is valid for all users and can be used by anyone.
Now follow the steps to fix cFosSpeed Driver issues:-
1. First, open This PC or My Computer on Windows 11.
2. Now go to C Drive > Program Files and then search for the “Lan Manager” folder & then open it.
3. After that, search for the unins001.exe file in that folder.
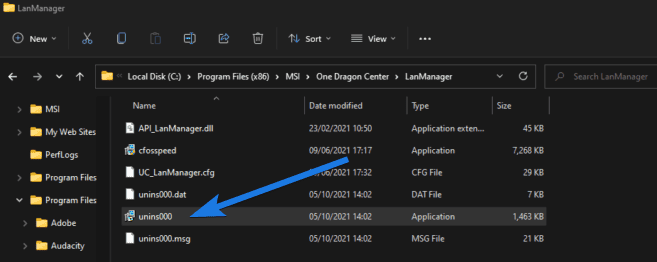
Image Credit:- wepc.com
4. Now double-click on it to uninstall the cFosSpeed driver installation files.
5. Now restart your PC and then check for Windows 11 update.
Note:- If any error occurs while uninstalling it, then I would suggest you to go to the task manager and search for “MSIcentralserver.exe” & then click on End Process.
Now let’s move to the next part…
Uninstalling cFosSpeed from Network Properties
However, the above two methods work really great in removing and uninstalling the cFosSpeed drivers but this method will completely delete all the driver’s files from your network properties also.
And here are the steps to follow:-
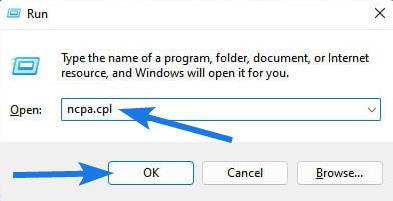
1. First, open the Run command by pressing “Windows + R“.
2. Now type ‘ncpa.cpl‘ command and then click on OK.
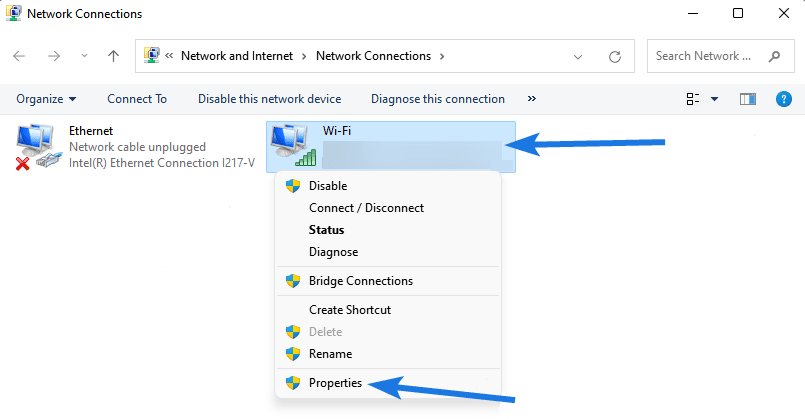
3. After that Network Connections windows will open up & then right-click on your default network adapter and then click on Properties.
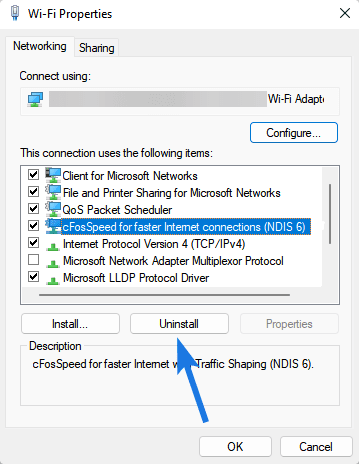
4. Now search for cFosSpeed connection and then click on Uninstall.
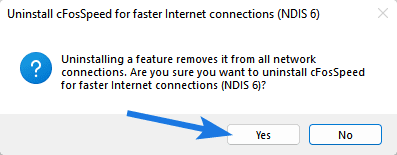
5. At last, it will ask for confirmation, so click on the Yes button.
Hopefully all the above will you in fixing your issues and now you can easily update your system. But before that, you can also check out How Long Does It Take to Install Windows 11?
That’s it for now…
Conclusion
So that’s how you can easily fix all your issues and errors related to the cFosSpeed Driver and after that can easily proceed to install Windows 11 on your PC. Also, we have tried to cover each and everything whether it’s related to MSI, Asus, Asrock, Gigabyte or any other.
Moreover, if you are facing any other error then please comment down.
Stay tuned for the next post…
Feel free to share your thoughts via comments & also tell us about this post on cFosSpeed Driver Windows 11: How to Fix Installation Error.
If you liked this post, don’t forget to share…
