Want to optimize Windows 11 for gaming?
If yes, then you are in the right place.
Although, we have already talked much about this operating system in our recent posts like Windows 11 pros and cons and many more.
But here we will be specifically covering the gaming part.
Everyone knows that this version of the operating system is released with lots of new upgrades and features.
And the best part is that Microsoft has also claimed that the gaming performance of Windows 11 is much faster than Windows 10.
For normal users, this OS is properly configured but if you are a professional gamer then you have to follow this optimization guide.
In this post, I will show you how to optimize your PC for gaming in Windows 11 and improve performance by using our favorite settings.
So without further ado, let’s get started…
Table of Contents
How to Optimize Windows 11 For Gaming [ 6 Ways ]

Windows 11 has got many new features that are totally for gamers and Microsoft has focused on providing the best gaming performance to the users. Auto HDR is completely a game-changer feature for a better gaming experience. And If you want to optimize the gaming experience, you just need to enable some modes which are mentioned below.
Apart from that, I have also seen many users searching for Windows 11 optimization script & tools to download on platforms like Reddit and Quora. But I would suggest you not to use them because they may contain viruses and malware.
Below we have mentioned, 6 ways for optimizing gaming performance on Windows 11. Just you have to configure some settings and you are done.
So, let’s dive in further…
1. Turn On Game Mode in Windows 11
This time developer has added a particular Game Mode for playing games. You can easily change the settings and can improve your gaming experience. Because this mode will help you to achieve more stable FPS while playing high-end games.
And here are the steps to follow:-
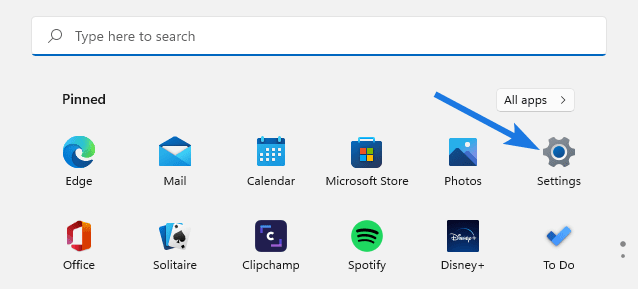
1. First, open Settings on your PC.
2. Now click on the ‘Gaming‘ option in the left sidebar & then go to the ‘Game Mode‘ tab.
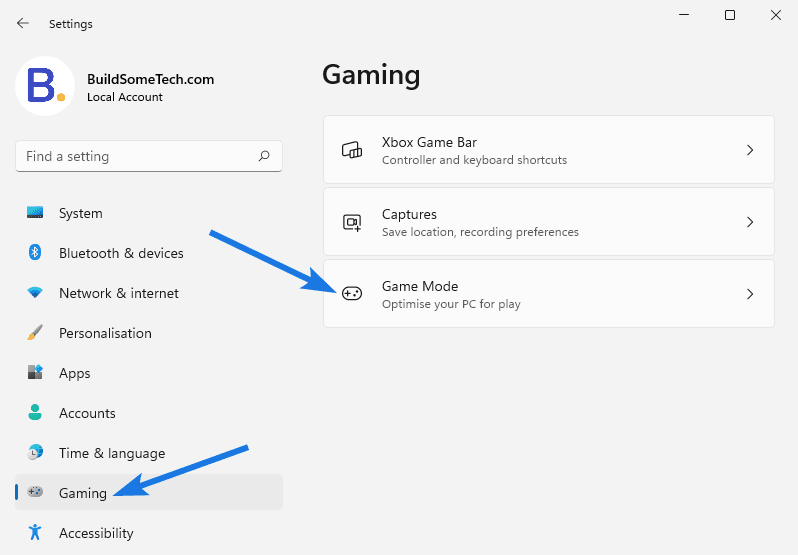
3. At last, turn on the ‘Game Mode‘ to optimize your PC.

And Done! If you want a detailed guide on this then you can check our recent post on how to fix Windows 11 low FPS.
2. Use Auto HDR
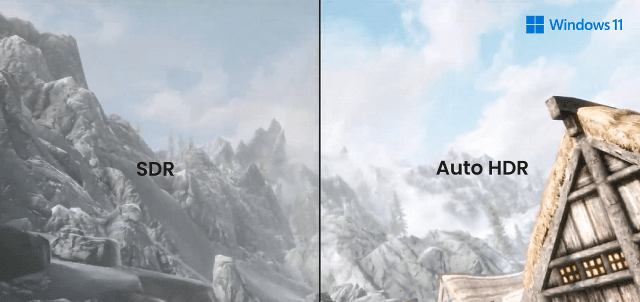
Image Credit: Bluestacks.com
In this way, you don’t need to enable anything for using this new gaming feature. Basically, this feature changes the picture quality making it better according to light. You just need to have an HDR-supported monitor for using this feature. And if you don’t have one, purchasing the monitor will be worth it.
The above image clearly shows the improvement in the picture quality and Auto HDR automatically enables after an HDR-supported monitor is connected.
3. Enable High-Performance Power Plan
You believe that but yes changing power plans or settings really helps to optimize the gaming experience. Generally, all PCs are set to the balanced mode which is only best for normal users and for good power backup in laptops. But if you are a professional gamer then enabling a high-performance option can definitely help you.
And here are the steps to follow:-
1. First, search for ‘Control Panel‘ and press Enter.

2. Now go to Power Options settings.

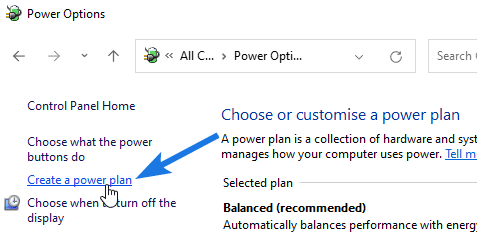
3. Now on the left-hand side section, click on Create a power plan.
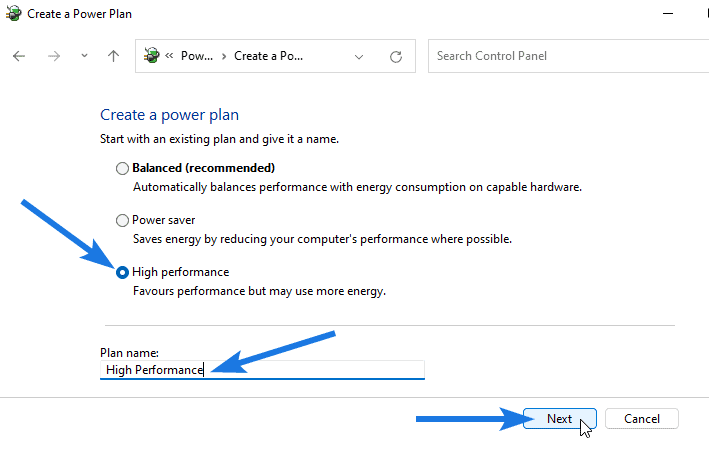
4. After that, create a power plan with High-performance settings & Plan name and then click on the Next button.
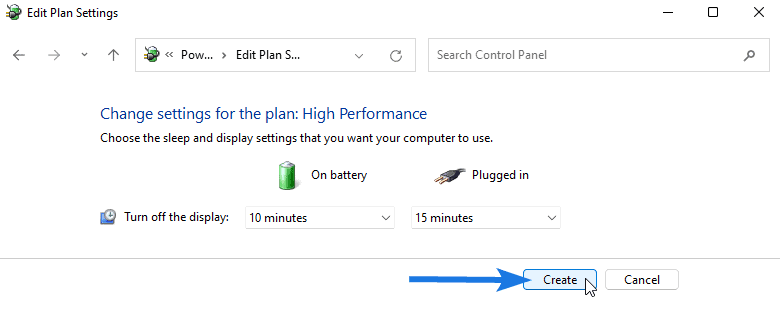
5. Now adjust settings for the plan and then click on Create.
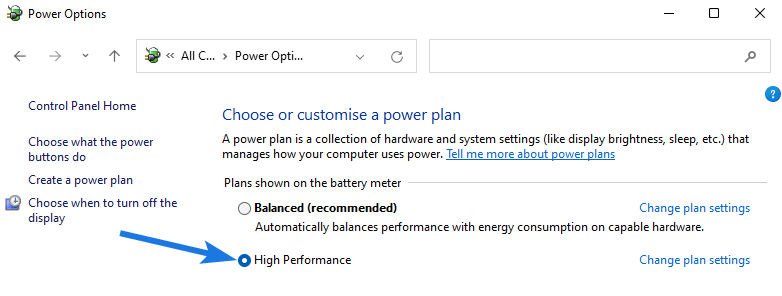
6. At last, select the power option as ‘High Performance‘.
Quick Tip:- If you are using a gaming laptop then try plugging in the charge and after that, you will surely see the difference while playing games.
4. Customize Windows 11 Graphics Settings
Usually, gaming laptops come with two GPUs, one is an integrated GPU like Intel HD Graphics & AMD Graphics and the second is a dedicated GPU like Nvidia. And in these laptops, it’s up to you about which GPU should be used by any application, and it’s recommended that you select a dedicated GPU from graphics settings for gaming purposes.
And here are the steps to follow:-
1. First, click on the Start menu and then go to ‘Windows Settings‘.
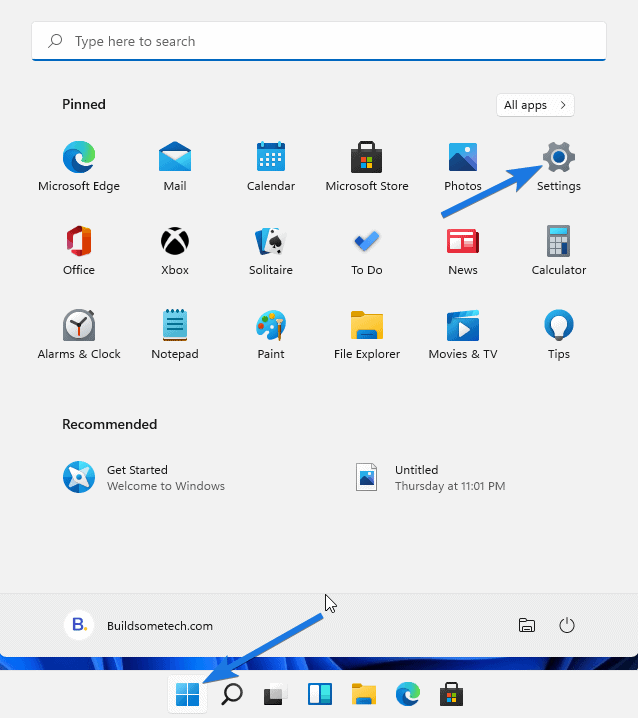
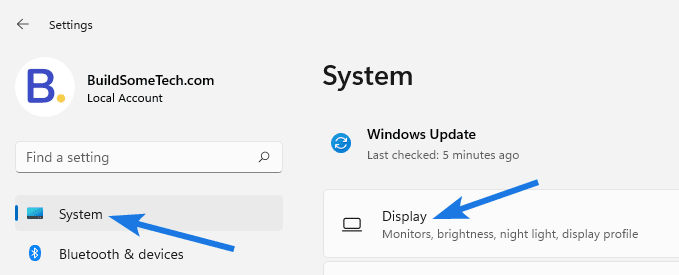
2. Now go to System settings & then click on the Display tab.
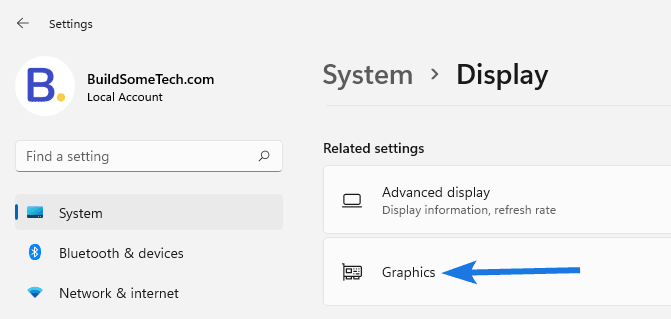
3. After that, scroll down and then under Related settings click on the Graphics tab.
4. Now search for the game or any application and then click on the Options button.
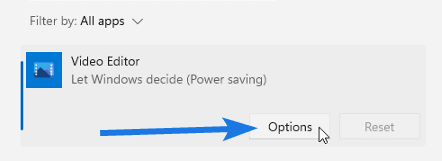
5. At last, select Graphics preference to High performance and then click on the Save button.
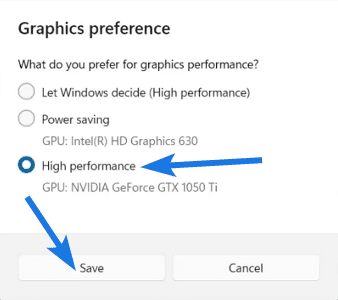
And after that, you will be able to use your graphics card specifically for high-end applications and games on your PC.
5. Use Dedicated NVIDIA and AMD Applications
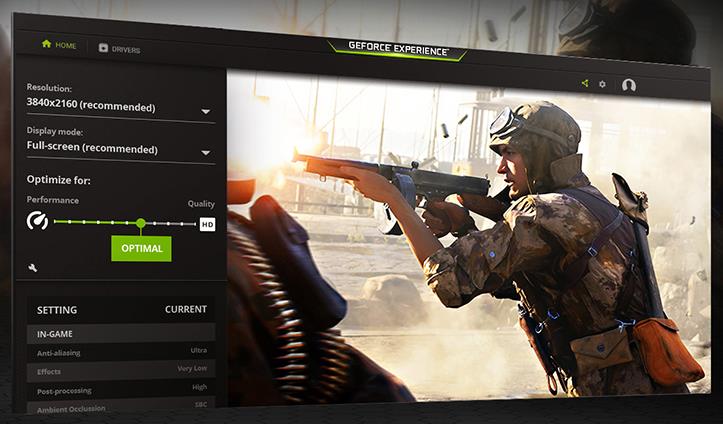
This way is also similar to the above one but here we will toggle with dedicated NVIDIA and AMD applications instead of changing Windows 11 settings. And this is the one thing you can do for optimizing the gaming performance is to change the graphics settings as per the games.
If you have Nvidia GPU, then download NVIDIA’s Geforce Experience software and for AMD GPU, download the AMD’s Radeon software. These apps are specifically made for changing graphics settings according to your need.
6. C: Drive Disk Cleanup
Although, this way is not directly related to gaming but it can still help you to speed up Windows 11 and can also improve overall performance. In Windows, games are installed and stored in a C: drive. If there is not enough space or the size of the C: drive is small, then you may face lag issues on your games. And in that case, cleaning up C: drive can help you to allocate more space.
And here are the steps to follow:-
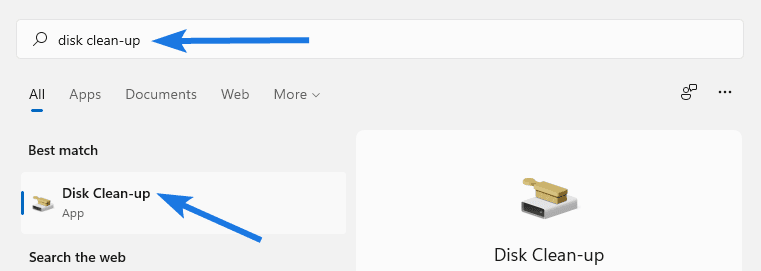
1. First, go to Start menu and search for ‘Disk Clean-up‘ & hit Enter.
2. Now click on the ‘Clean up system files‘ button.
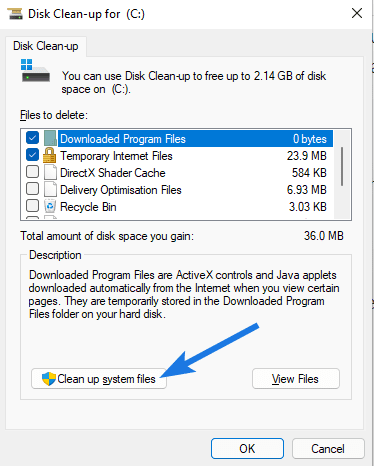
3. After that, and select the files to delete & then click on OK button.
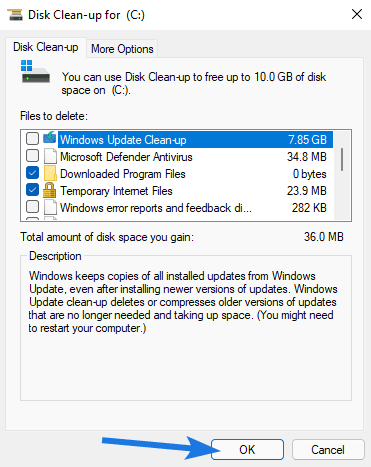
3. At last, click on the ‘Delete Files‘ button.
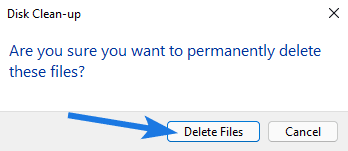
Now wait for 2-3 minutes to complete the disk cleanup process and then you will see a good amount of space is restored.
Windows 11 Gaming Features

However, I have already mentioned all the important gaming features of Windows 11 in the above sections but still to give an overview of two more features this part is added. This time, Microsoft claims that this version of OS will give you an Xbox-level gaming experience because of these features.
- Xbox Game Pass: Windows 11 has an Xbox Game Pass app using which you can access all of the Xbox games ( you will have to buy for sure ). This pass will give you access to Xbox Cloud too, you will be able to play big games using that cloud platfrom.
- Auto HDR: This Xbox techology is also added to Windows 11 which will enhance the video quality of your games automatically. You will get a more realistic and clean graphics experience like playing in Xbox console.
- DirectStorage: This feature supports direct access to SSD storage which result in faster processing and better FPS too. It allows you to play games smoothly with no log at all.
Apart from all these features, you may find some differences between Windows 11 Home vs Pro. So, I suggest you to check this article for more details.
That’s it for now…
Conclusion
So, that’s how you can easily speed up and optimize your laptop or PC for gaming on Windows 11. And you can also use these settings to optimize Windows 10 for gaming but the interface would be a little different.
Moreover, we have tried to include all the important parts in this post and will be updating it soon at regular intervals.
Stay tuned for the next posts…
Feel free to share your thoughts via comments and also tell us about this post on How to Optimize Windows 11 For Gaming [ 6 Ways ].
If you liked this post, don’t forget to share it.
