Want to Bypass Windows 11 Requirements & CPU Check?
If yes then you are in the right place.
Although, Microsoft released its latest Windows OS with lots of new features and improvements.
But still, there are so many users who are struggling with the unsupported hardware issues.
And that’s why users are asking to bypass these requirements. Most of them are having issues with their Processor and CPU.
Moreover, in the previous post, I have already shared a detailed guide on how to bypass secure boot and TPM 2.0.
You can check them out and if they didn’t work for you, then this post will definitely gonna help you out in this.
So, let’s see how it works…
Table of Contents
How to Bypass Windows 11 Requirements & CPU Check [ 3 Ways ]

But before we begin, here is a quick overview.
Although, Microsoft made all these system requirements mandatory for improving security and privacy. But these requirements made it users very hard to upgrade to Windows 11 OS. And that’s why Microsoft itself suggested one way to bypass these requirements, which we will be discussing later in detail.
Apart from this, I have also seen many users who also don’t know how to check the system compatibility for Windows 11. And if you have already done this, then I would suggest you to check again using the above link.
Moreover, I have also seen many cases where the users were fulfilling all the requirements but the CPU features were disabled. And that’s why I have recently posted about how to turn on TPM 2.0 in any BIOS for Windows 11.
And if you have already done all this, then follow the given ways.
So, let’s get started…
1. Bypass Windows 11 Requirements [ Offical Microsoft Way ]
After getting all these comments related to these incompatible system requirements, Microsoft officially stated this on their support page. And using this method you can easily avoid all these security CPU checks.
But Microsoft also stated that they don’t recommend this method and can cause security issues on your Windows 11 PC. Apart from this, you can easily use these registry keys to bypass the TPM 2.0 requirements.
So, let’s see how it works…
1. First, Press Windows+R keys to open the run window
2. Type Regedit on the run and press enter.
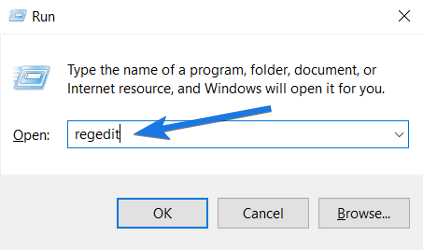
3. A window will open, Go to this location- HKEY_LOCAL_MACHINE\SYSTEM\Setup\MoSetup

4. Now, create a DWORD (32-bit) value called AllowUpgradesWithUnsupportedTPMorCPU.

5. Now change the value of AllowUpgradesWithUnsupportedTPMorCPU to 1 and click on the OK button.
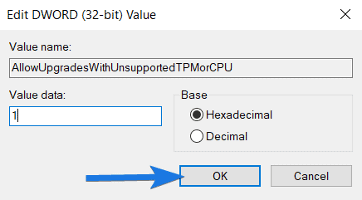
6. Close all the windows and restart your computer.
And Done! Now you have successfully bypassed the TPM and other system requirements.
Note:- Please be careful while making changes to the registry files because it can cause serious problems if configured incorrectly.
Now, let’s move to the next way…
2. Using Custom Windows 11 Installation Media of Rufus
In this method, I will show you how easily you can bypass all Windows 11 installation requirements like TPM, Secure Boot, and also the minimum 8 GB RAM requirement. Just you have to follow the given steps where I have used the Rufus tool to create a custom installation media without all these requirements checks.
So, let’s see how it works…
1. First, download the Windows 11 ISO file from the given link.
2. After that, download the Rufus beta version from the given source.
3. Once Rufus is downloaded, double-click on it to run.
4. Now insert the USB Drive into your laptop or PC.

5. After that, click on the SELECT button. ( On the left of Boot selection )
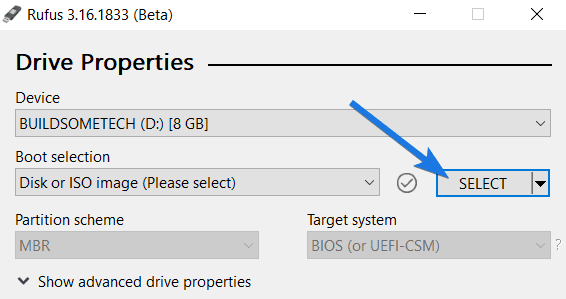
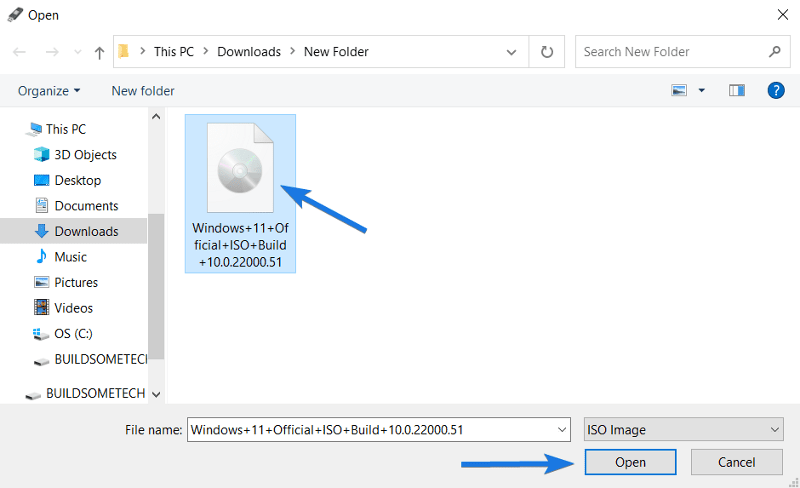
6. Now navigate to the ISO Image file that you have downloaded earlier and then click on Open.
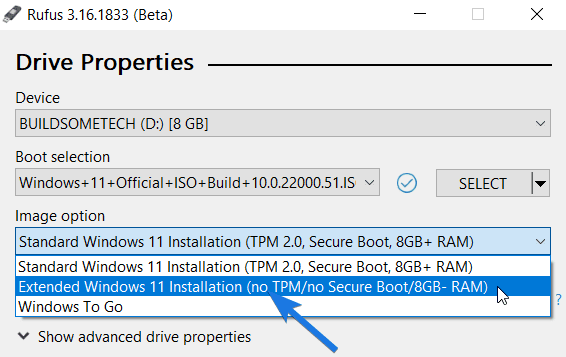
7. Now under the Image option section, click on the drop-down menu and select the Extended Windows 11 Installation (no TPM/no Secure Boot/8GB – RAM) option.
8. At last, click on the START button and then wait for a few minutes while Rufus is creating your Win 11 custom installation USB.
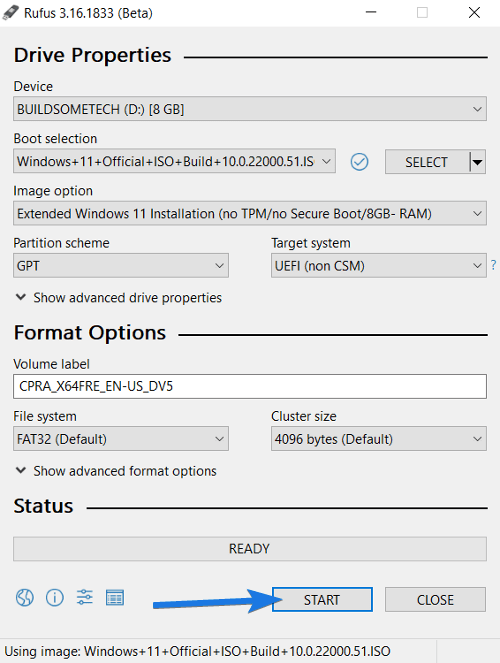
And Done! Now you can use this USB to upgrade your PC.
Now let’s move to the next method…
3. Bypass TPM Check via Media Creation Tool
This method is for the users who want to do a clean Windows 11 install and do not like upgrading from the previous version of Windows. In this method, you will need a USB drive or an ISO file that disables the TPM detection. And then you will need a custom MediaCreationTool by Aveyo’s.
So, let’s see how it works…
1. First, Go to the MediaCreationTool GitHub page.
2. Now, you will see a ‘Download Zip’ option in the top right corner, so click on it to download the file.

3. Now, extract the downloaded zip file.
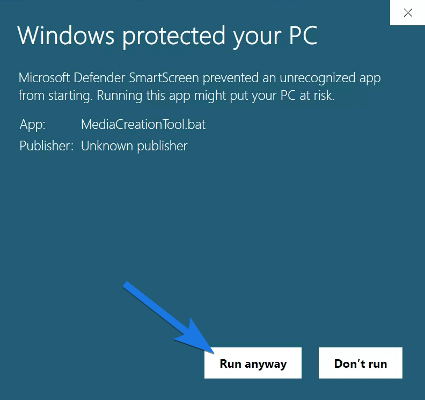
4. Run the extracted “MediaCreationTool.bat” file. You may see a message as ‘Windows protected your PC’ message. Click on the more info option.

5. Now click on the Run anyway button.
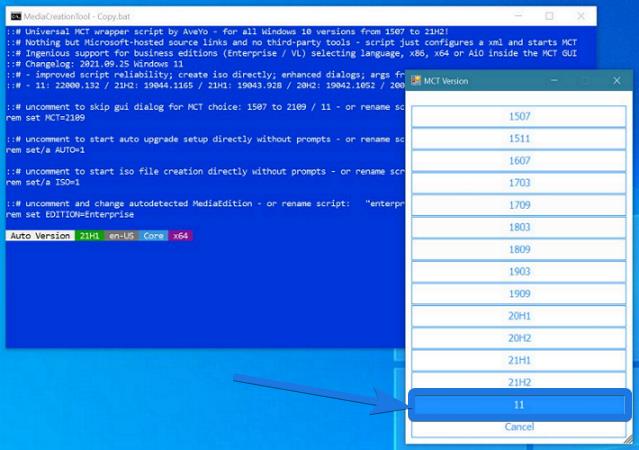
6. After that, It will ask for the MCT version, so select the 11 from the list.
7. Now, select the Create USB option if you have a USB drive.
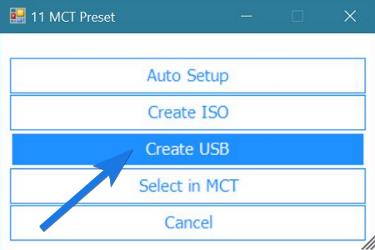
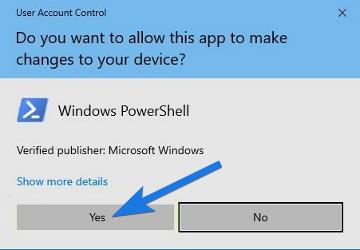
8. After that, Windows Powershell will ask for your permission, Click on the ‘Yes’ button. You may see a bar saying ‘Windows 10 setup’ don’t worry it will create the Windows 11 ISO file.
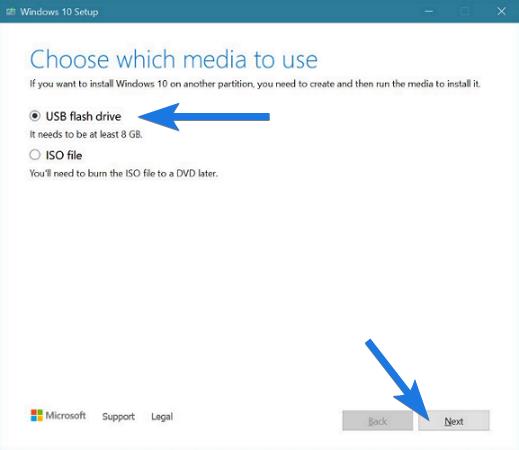
9. Now select which media to choose as a USB flash drive and then click on Next.
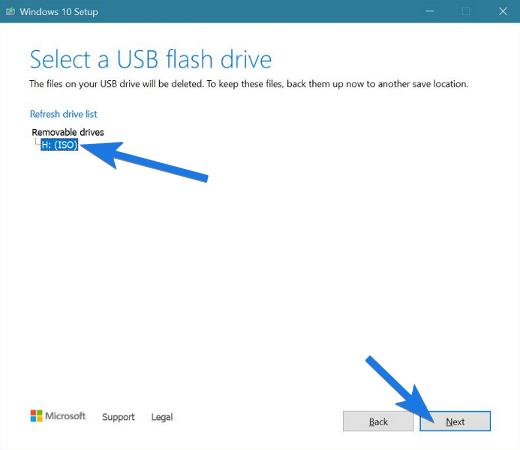
10. After that, select the USB location and click on the Next button.
11. Now, the tool will start downloading the installation files and will also create Windows 11 bootable USB drive for you.

12. Now, just use the flash drive or ISO file for installation and you will not face any issue regarding TPM requirements.
And done! Now if you want to download Windows 11 media creation official one, then you can check out this link.
4. Using Windows 11 TPM Bypass Script
I know it’s really hard to bypass Windows 11 TPM requirement but this last way will definitely help you in fixing the TPM issues on your computer. In this method, we will be using a script for skipping all these CPU check requirements.
Note:- This is an open-source MediaCreationTool. You just have to run a part of this script.
So, let’s see how it works…
1. Open this GitHub Bypass Script link.
2. Scroll down the above link and look for “Skip_TPM_Check_on_Dynamic_Update_v2.cmd”
3. Now, copy all the lines of this page.
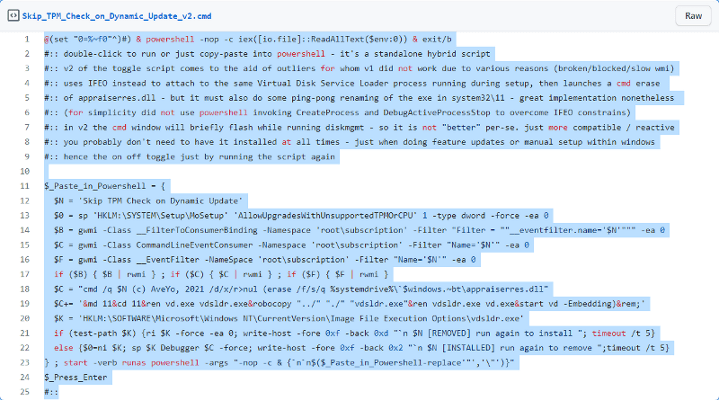
4. Open the notepad on your computer and Paste the copied lines of code.
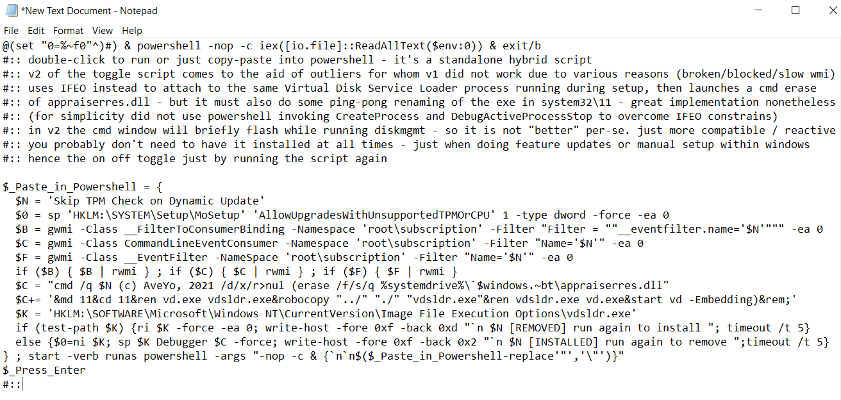
5. Now, save the notepad file named “disable-tpm-check.cmd” on the desktop screen.

6. Now, double-click on the saved file, and a small popup Windows PowerShell will open up, so click on the Yes button.

7. A PowerShell will open, the top line written is “Skip YPM Check on Dynamic Update [installed]. Run it only once and the TPM check will be disabled.
![Skip YPM Check on Dynamic Update installed Skip YPM Check on Dynamic Update [installed]](https://www.buildsometech.com/wp-content/uploads/2021/10/Skip-YPM-Check-on-Dynamic-Update-installed.png)
8. Now, just go ahead with Windows 11 update and you will not face any requirement issues.

Note:- Apart from this, if you want to download Windows 11 beta version then you can check this official file link.
That’s it for now…
Conclusion
So, that’s all about bypassing system requirements for installing Windows 11 on your PC without fulfilling the TPM 2.0, Secure Boot, Processor, or any other hardware requirement. Just you have to follow the given step-by-step guides and you will easy to go.
Also, after doing all these settings you may not get the real security features from Microsoft which are made for this operating system.
Stay tuned for the next post…
Feel free to share your thoughts via comments and also tell us if you know any better way on How to Bypass Windows 11 Requirements & CPU Check.
If you liked this post, don’t forget to share.

Thanks, worked great. I bought a used laptop with TPM 2.0 and it worked great at first but the processor didn’t meet their rising standards speedwise in the final builds. It actually runs as quick or even faster than win10 did. Thanks.